
Father’s Day Card
There are a lot of reasons to feel ambivalent about Hallmark® Holidays, but they are also opportunities to be creative and make interesting new projects. So for Father’s Day, I wanted to make a card that’s more than just my hand-drawn note. I started by envisioning a scene involving a nice big radar dish. Why? Well, my father was a pioneer in the field of radar. In fact, he’s known as the Father of Radar Interferometry, which means my siblings and I spend a lot of time looking suspiciously at one another sayin “well, I’m not radar interferometry, so one of you must be!”
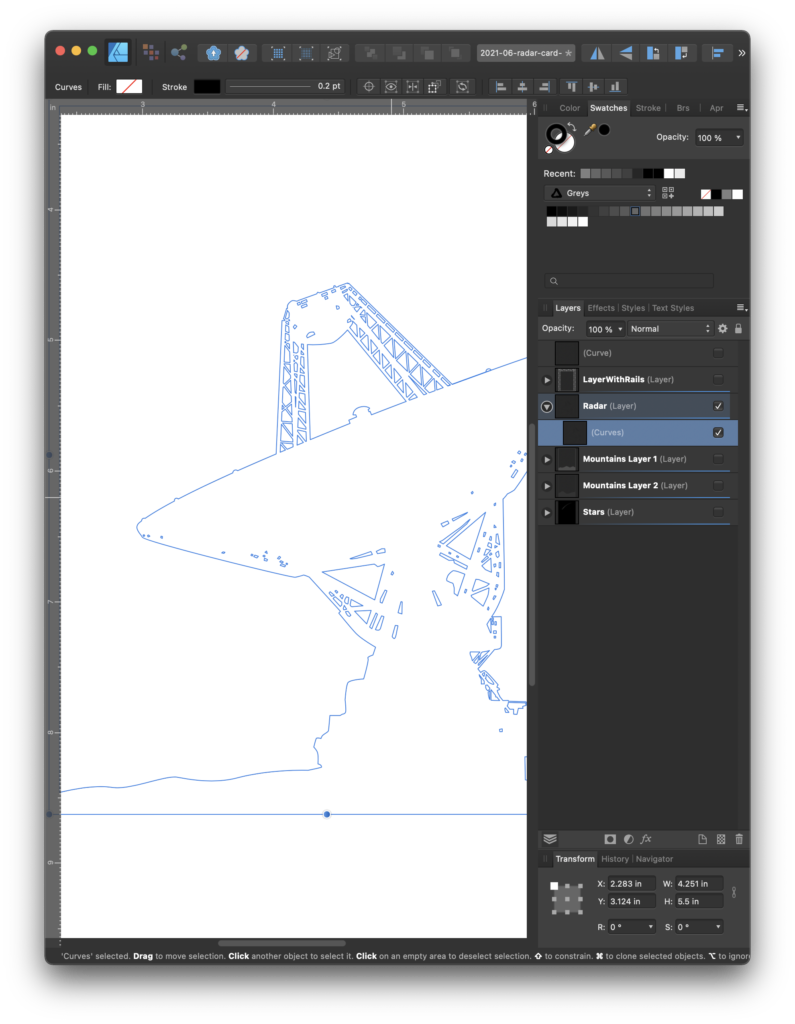
From this imagined scene (based on the Goldstone Tracking Station), I spent a pleasant evening drawing up layers in my favorite vector design program, Affinity Designer. My technique for complex vector designs involves roughing out the major chunks using basic shapes like ellipses and rectangles, and using boolean operations to add or subtract shapes from one another until I’m near the desired shape. Then, I go into the line-editing mode and manipulate the individual bezier nodes until I have something I like.
Based on this helpful CrashSpace blog post, I knew that I’d want to cut the layers out using the Silhouette SD cutter. The Silhouette Design software that drives the cutter accepts a variety of file formats, none of which are directly output by Affinity Designer, so I had to export my layers as SVG, import them into Inkscape, and export from there as DXF. Silhouette Studio happily accepts DXF, so I was able to load up and cut the designs.
There were a few false starts. First, I had the wrong cutting mat selected, so my first cut missed my card stock. With the power of internet search I found a lot of helpful guides out there, which got be back on track. The next thing I ran into was that my design has too much detail, or at least the details are too small. Somewhere, I’m not sure where, I read that the Silhouette SD has a 600DPI equivalent resolution. If your details are part of a continuous line (like a border of something), it seems I could get very detailed results. But when it came to cutting out tiny shapes, I wasn’t as successful. I tried different “corner overcut” settings, but eventually decided to go with the defaults and accept that it wouldn’t be perfect.
Once I cut the layers, I cut thin slices of foam core, and laboriously hot-glued them to the edges of my layers, and then hot-glued the layers together. To cover the ugly edges, I used a nice piece of ribbon (also hot glued). Overall, I think the project looks pretty good.
Designing with vectors! 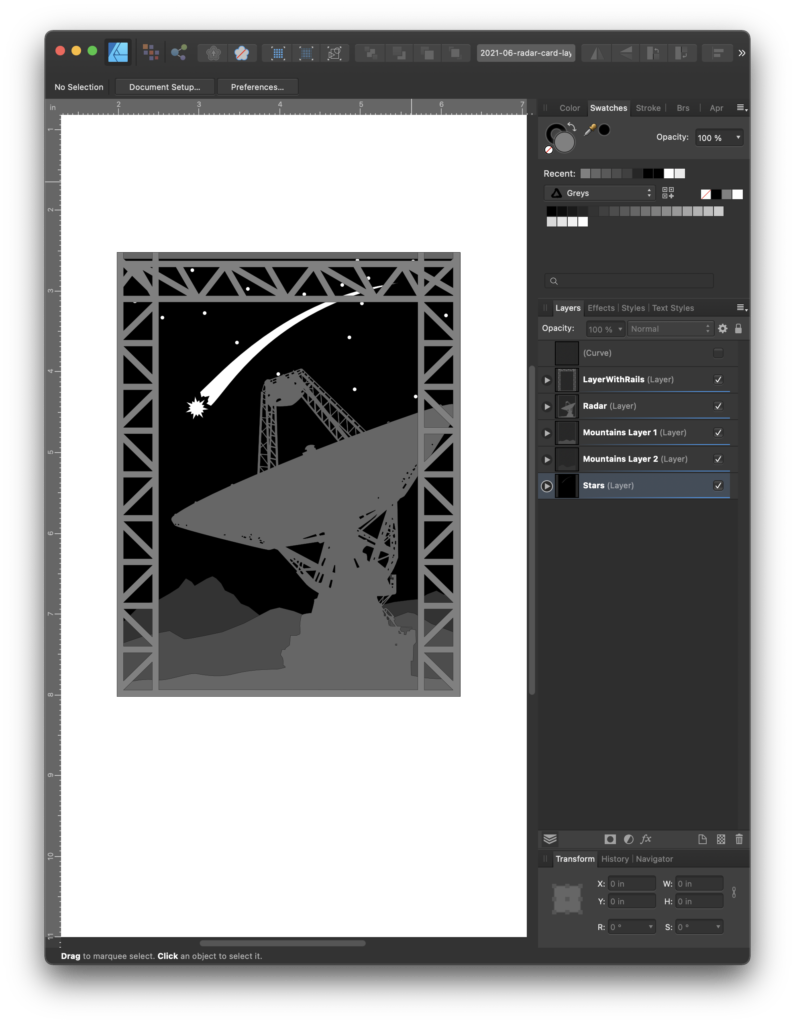
The design layers 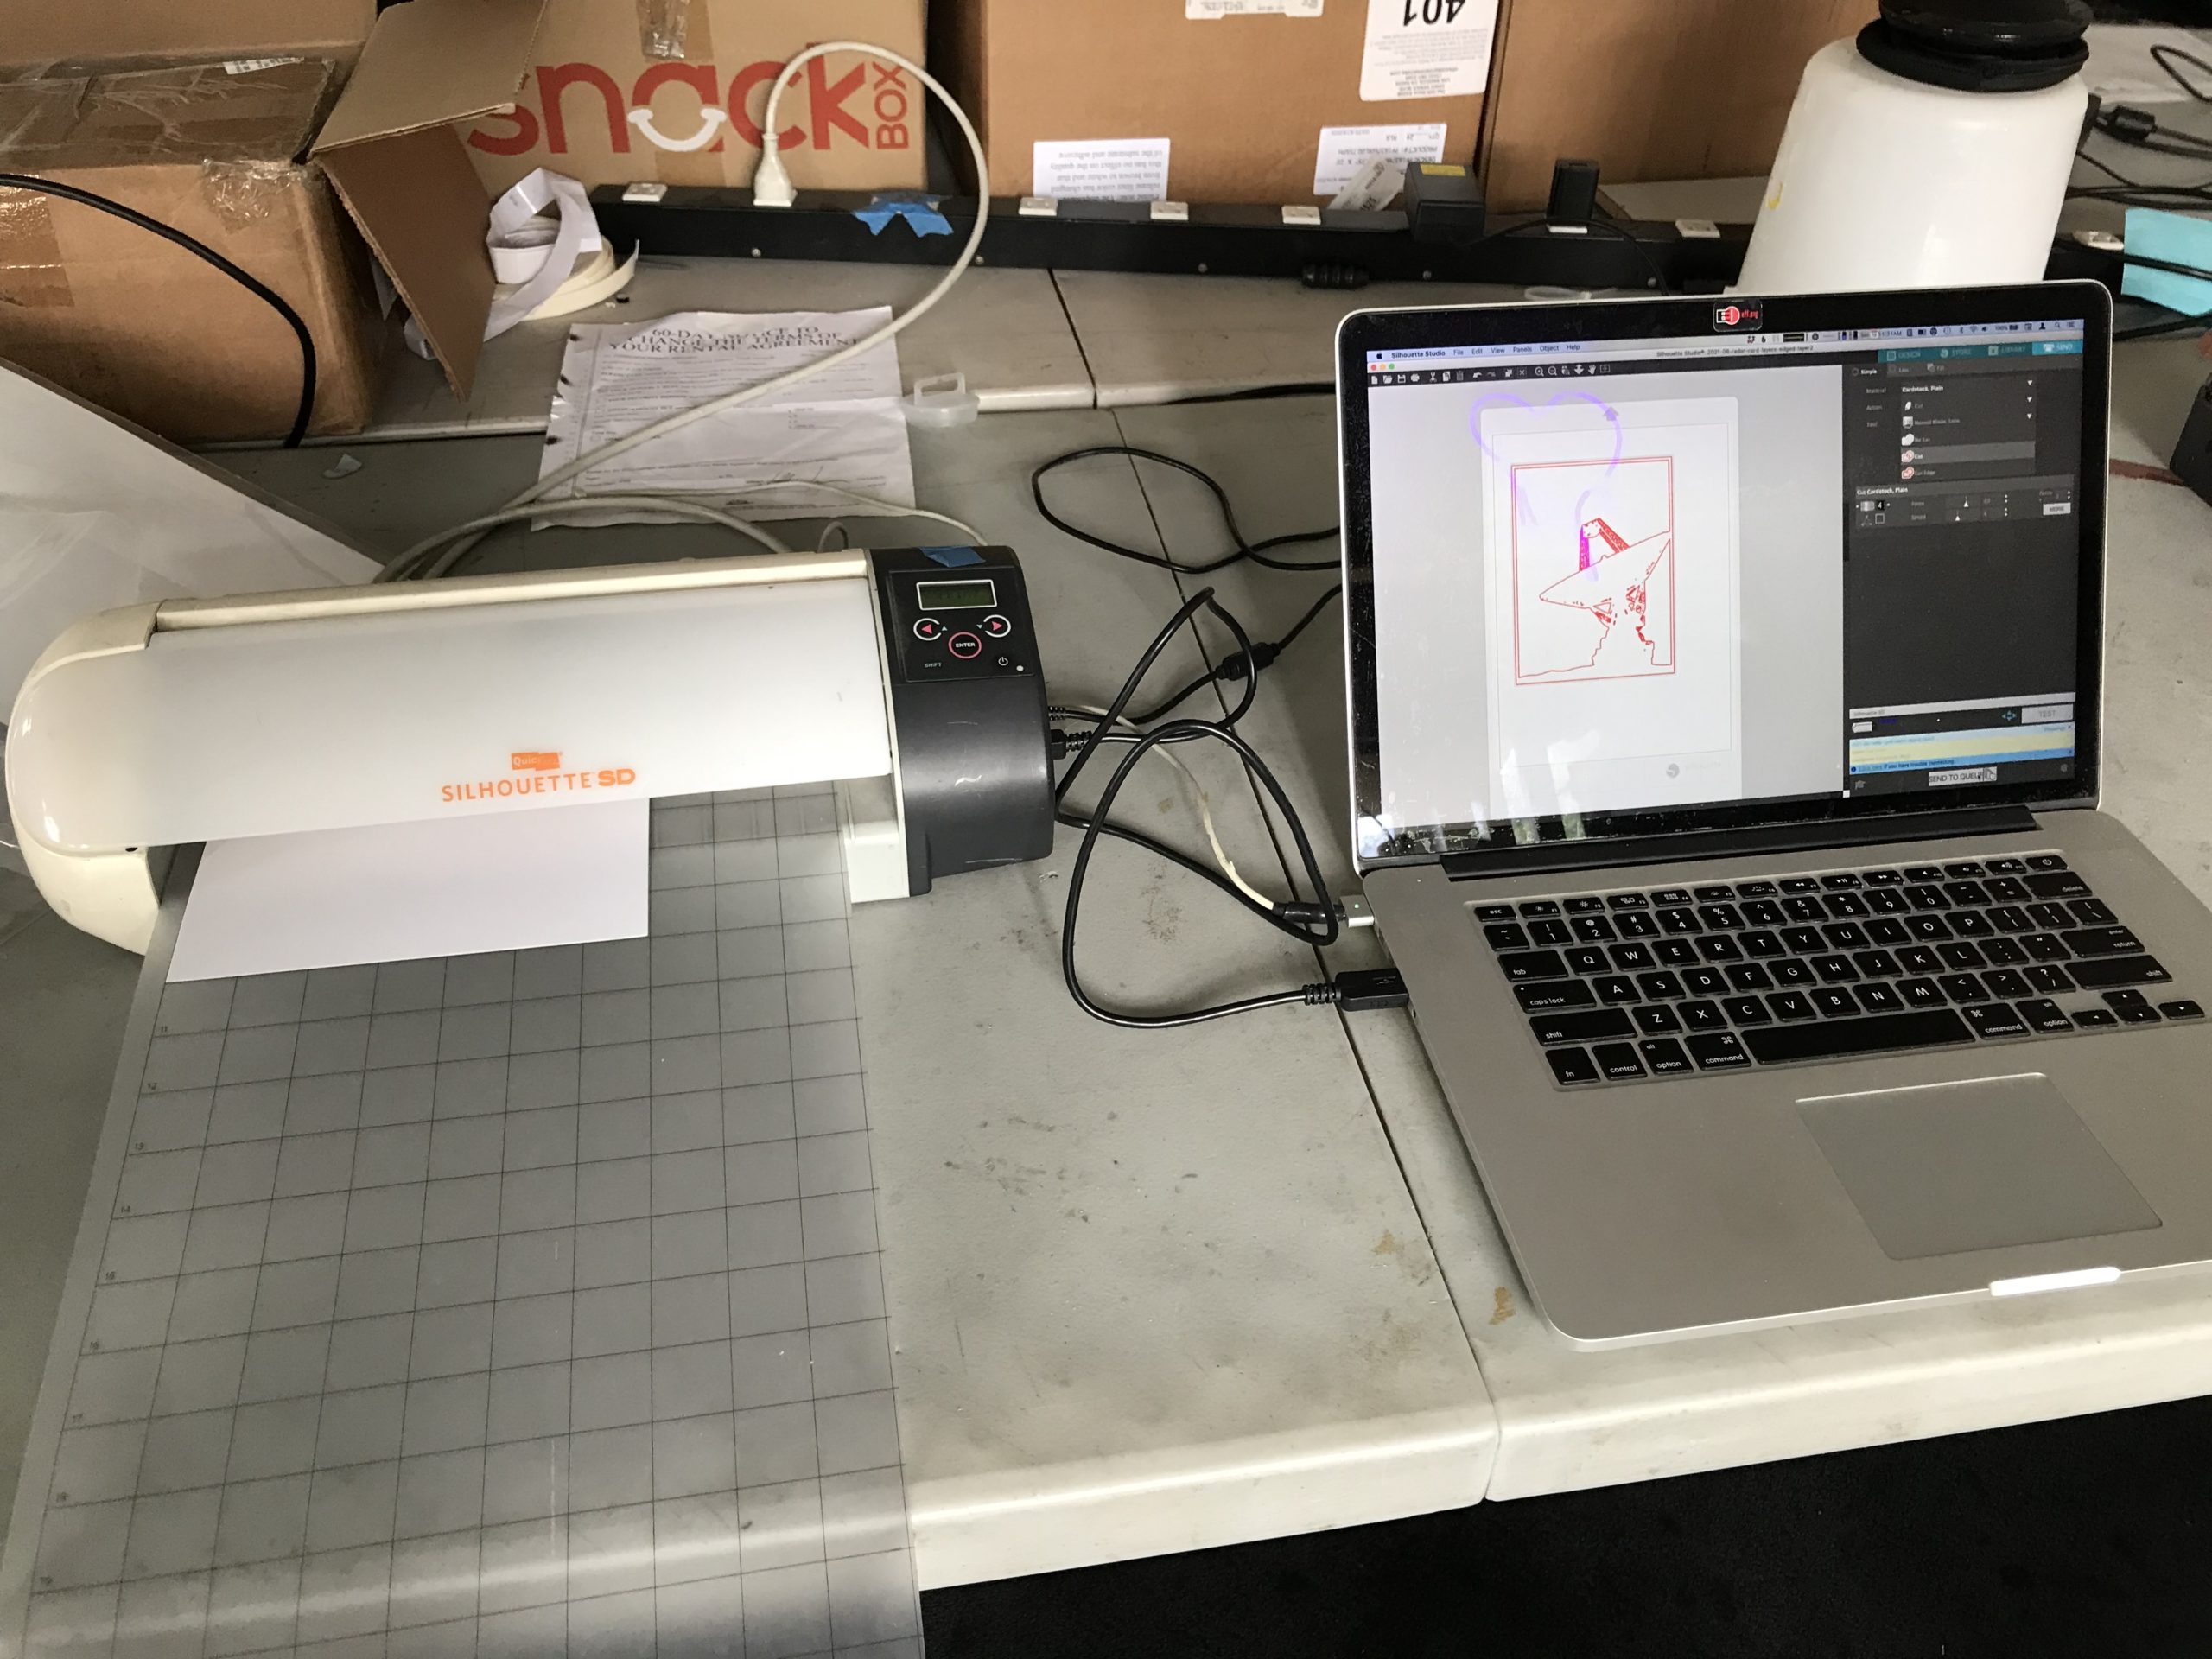
Cutting the design 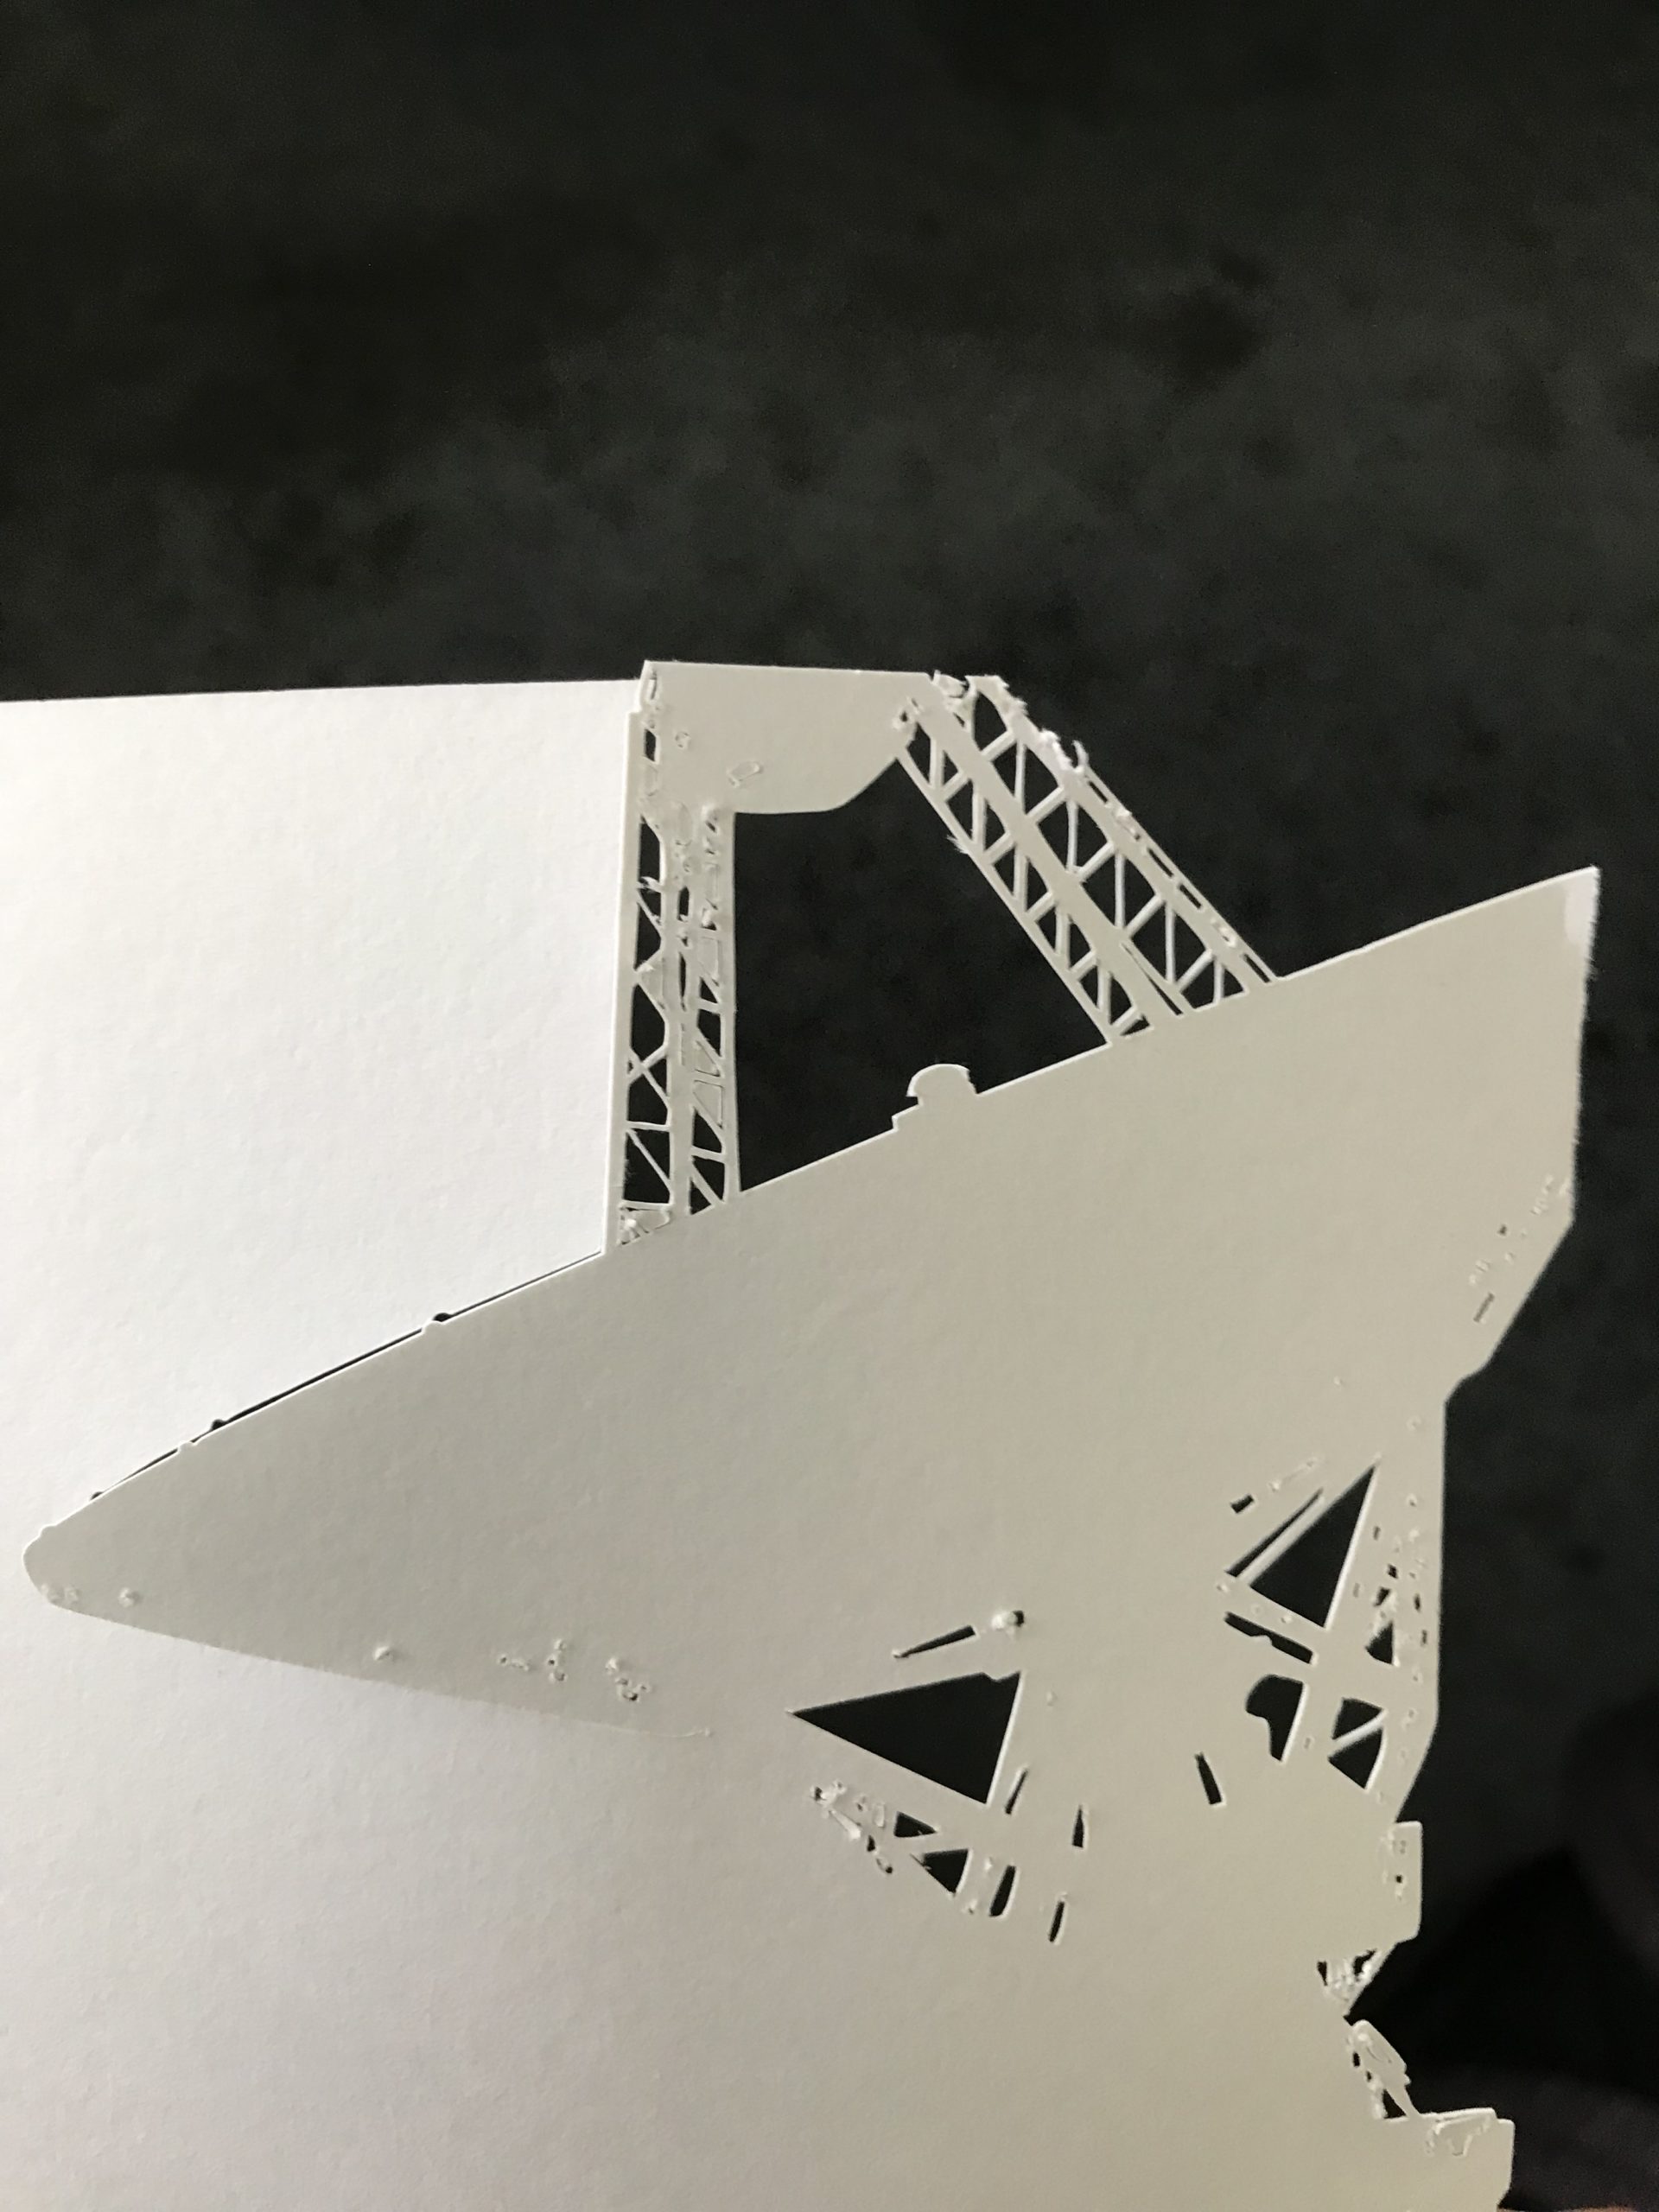
Ooh, that didn’t quite work 
Better, but needs cleanup 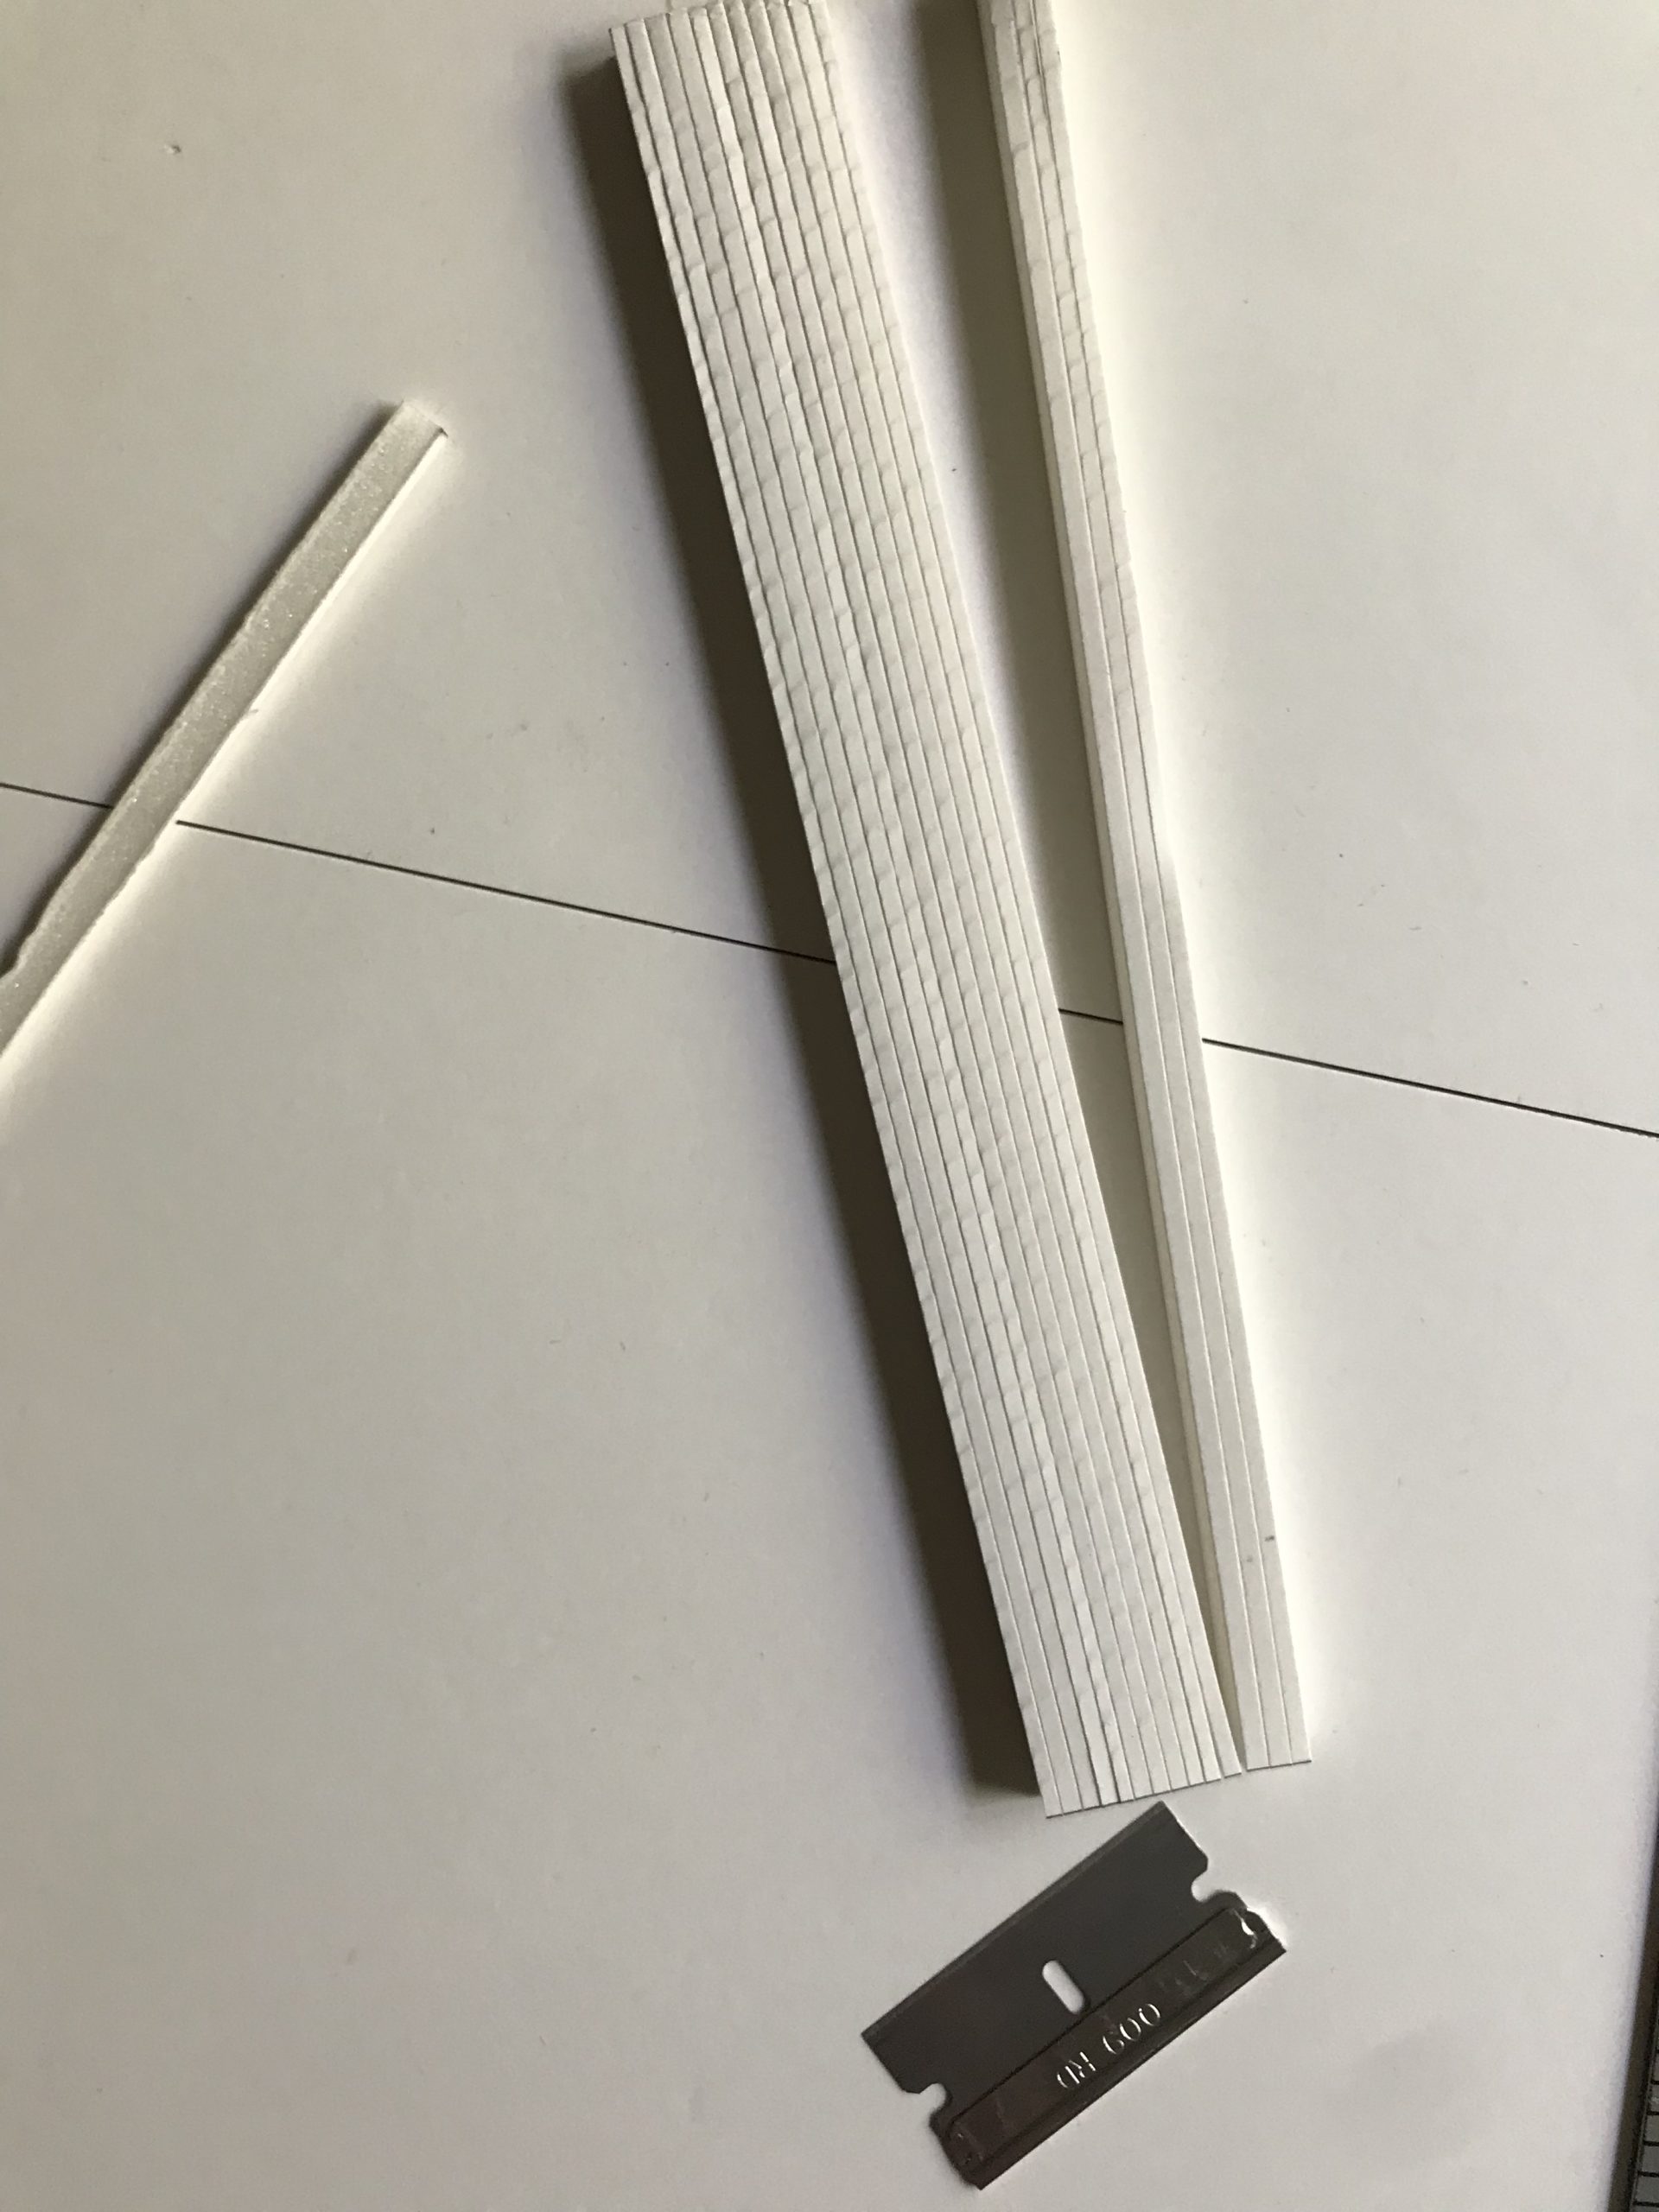
Slicing foam core 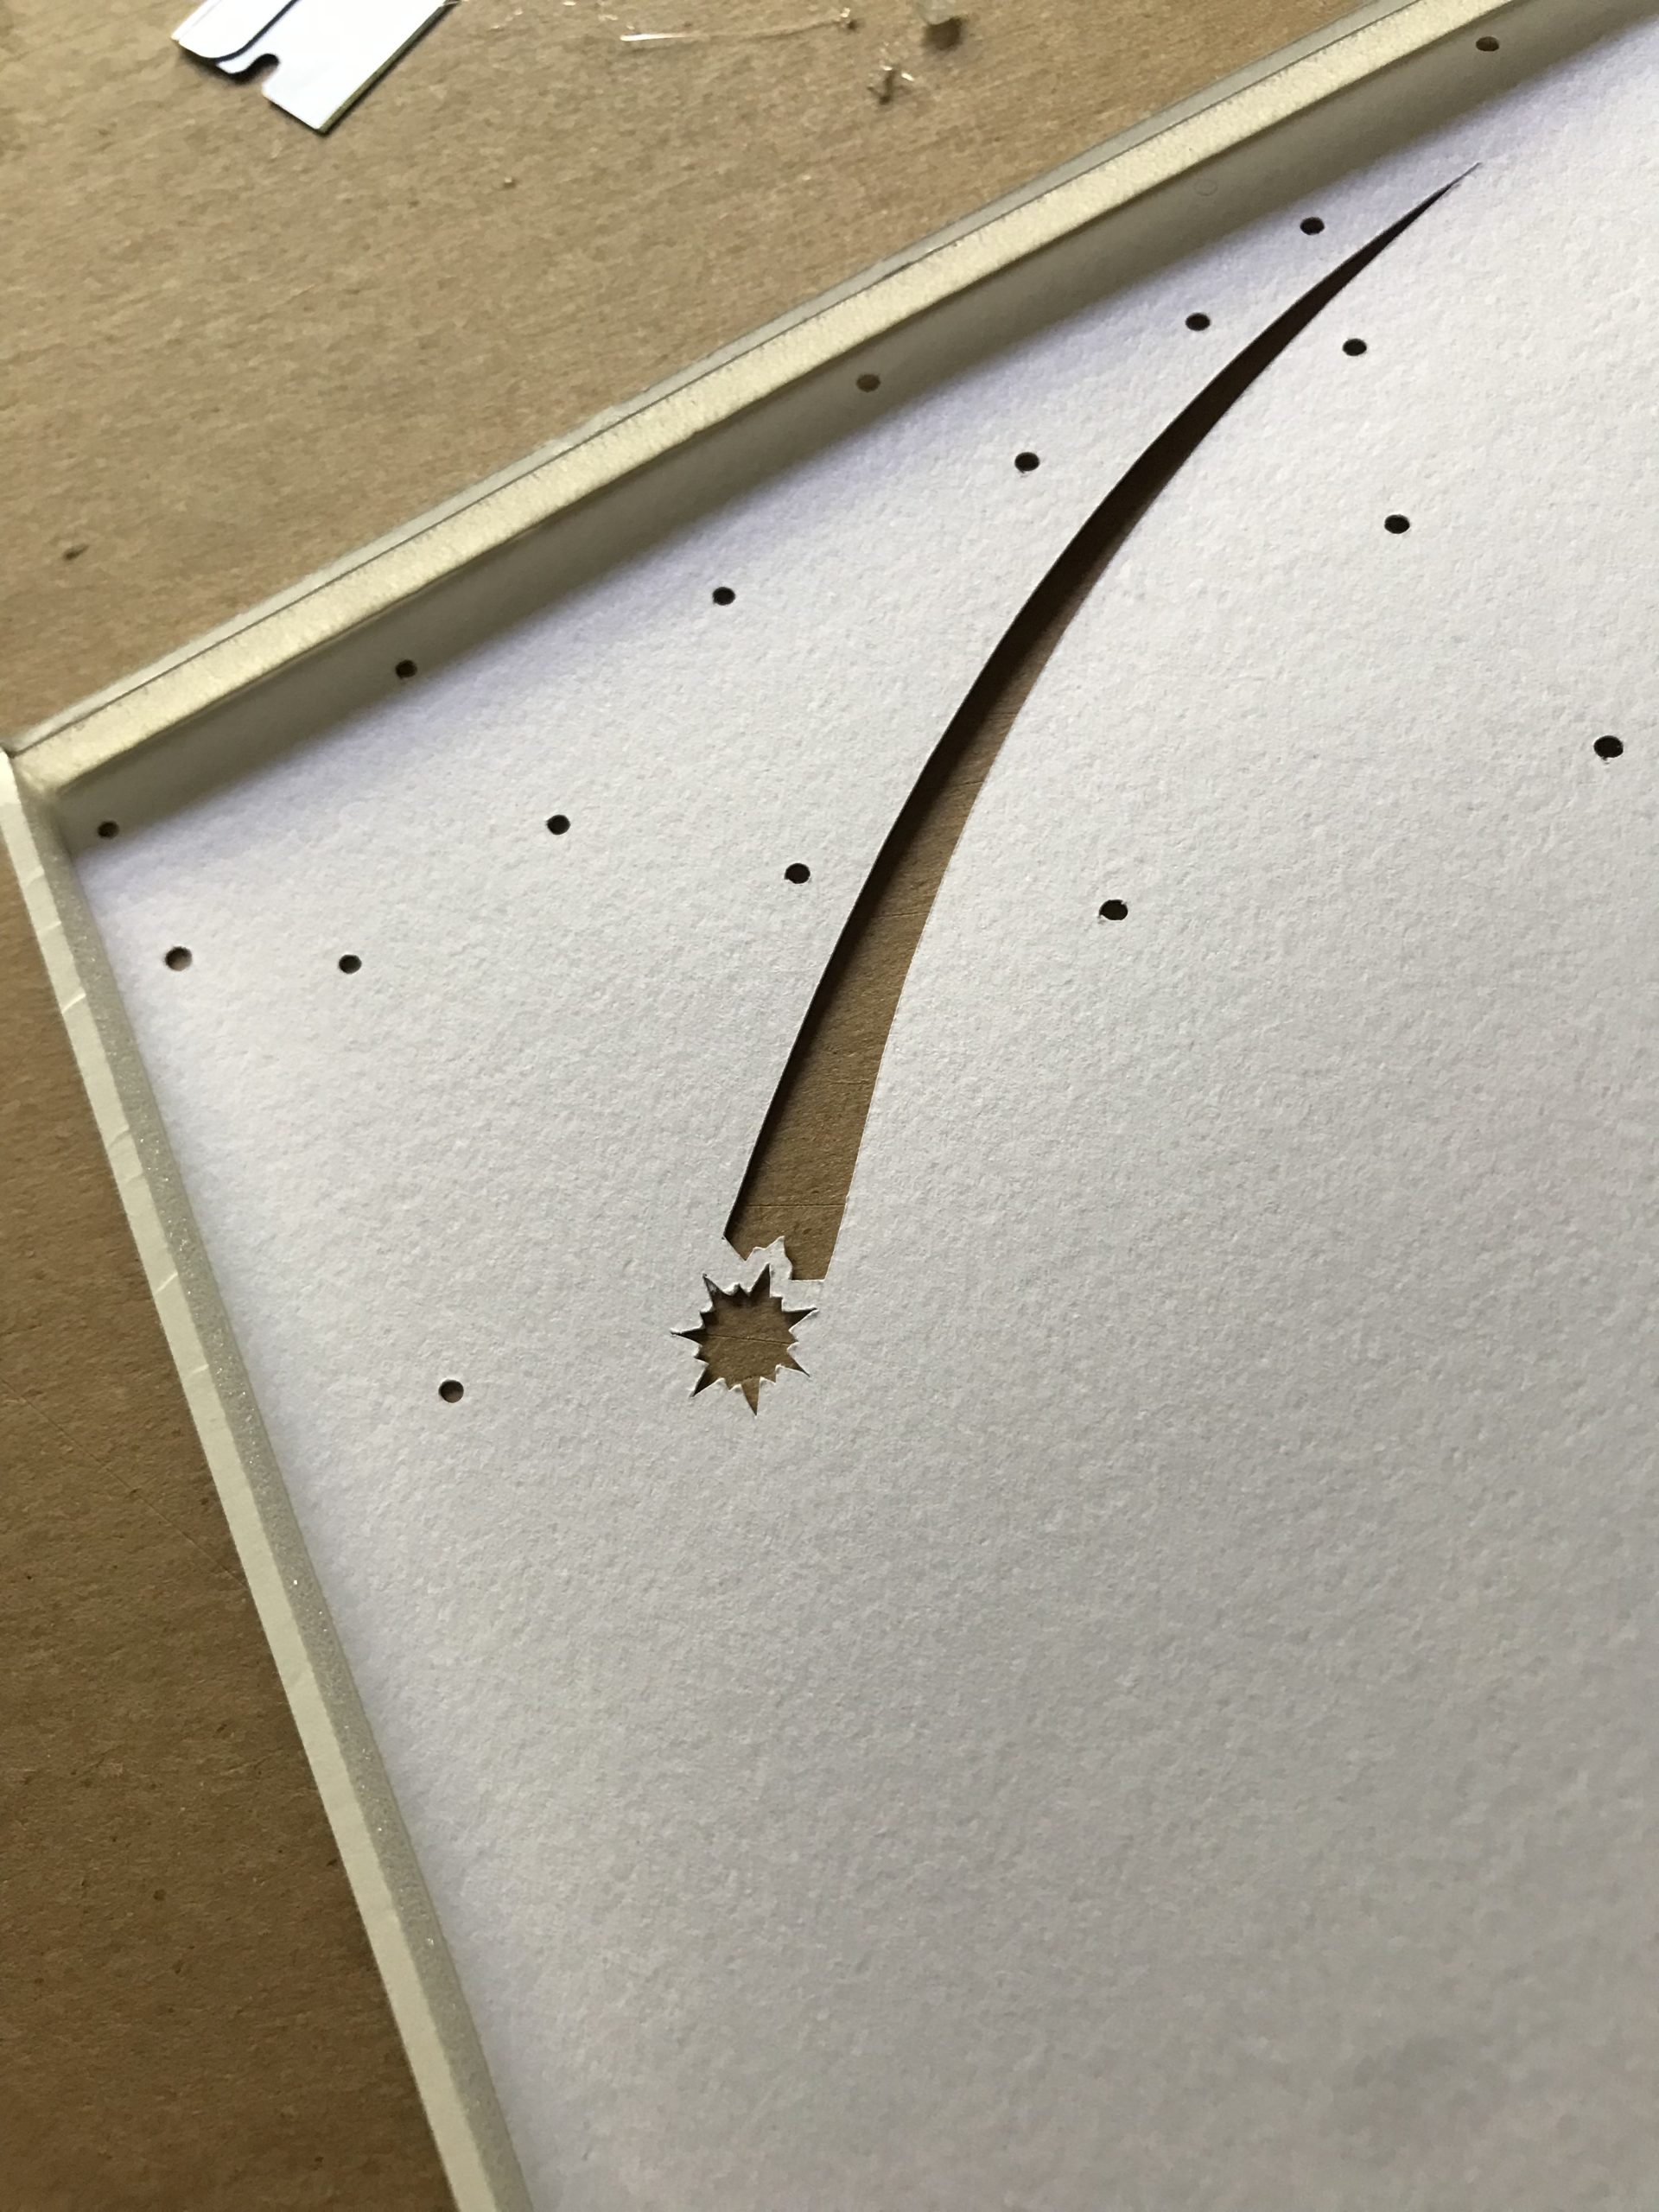
Hot gluing the foam core spacers to a layer 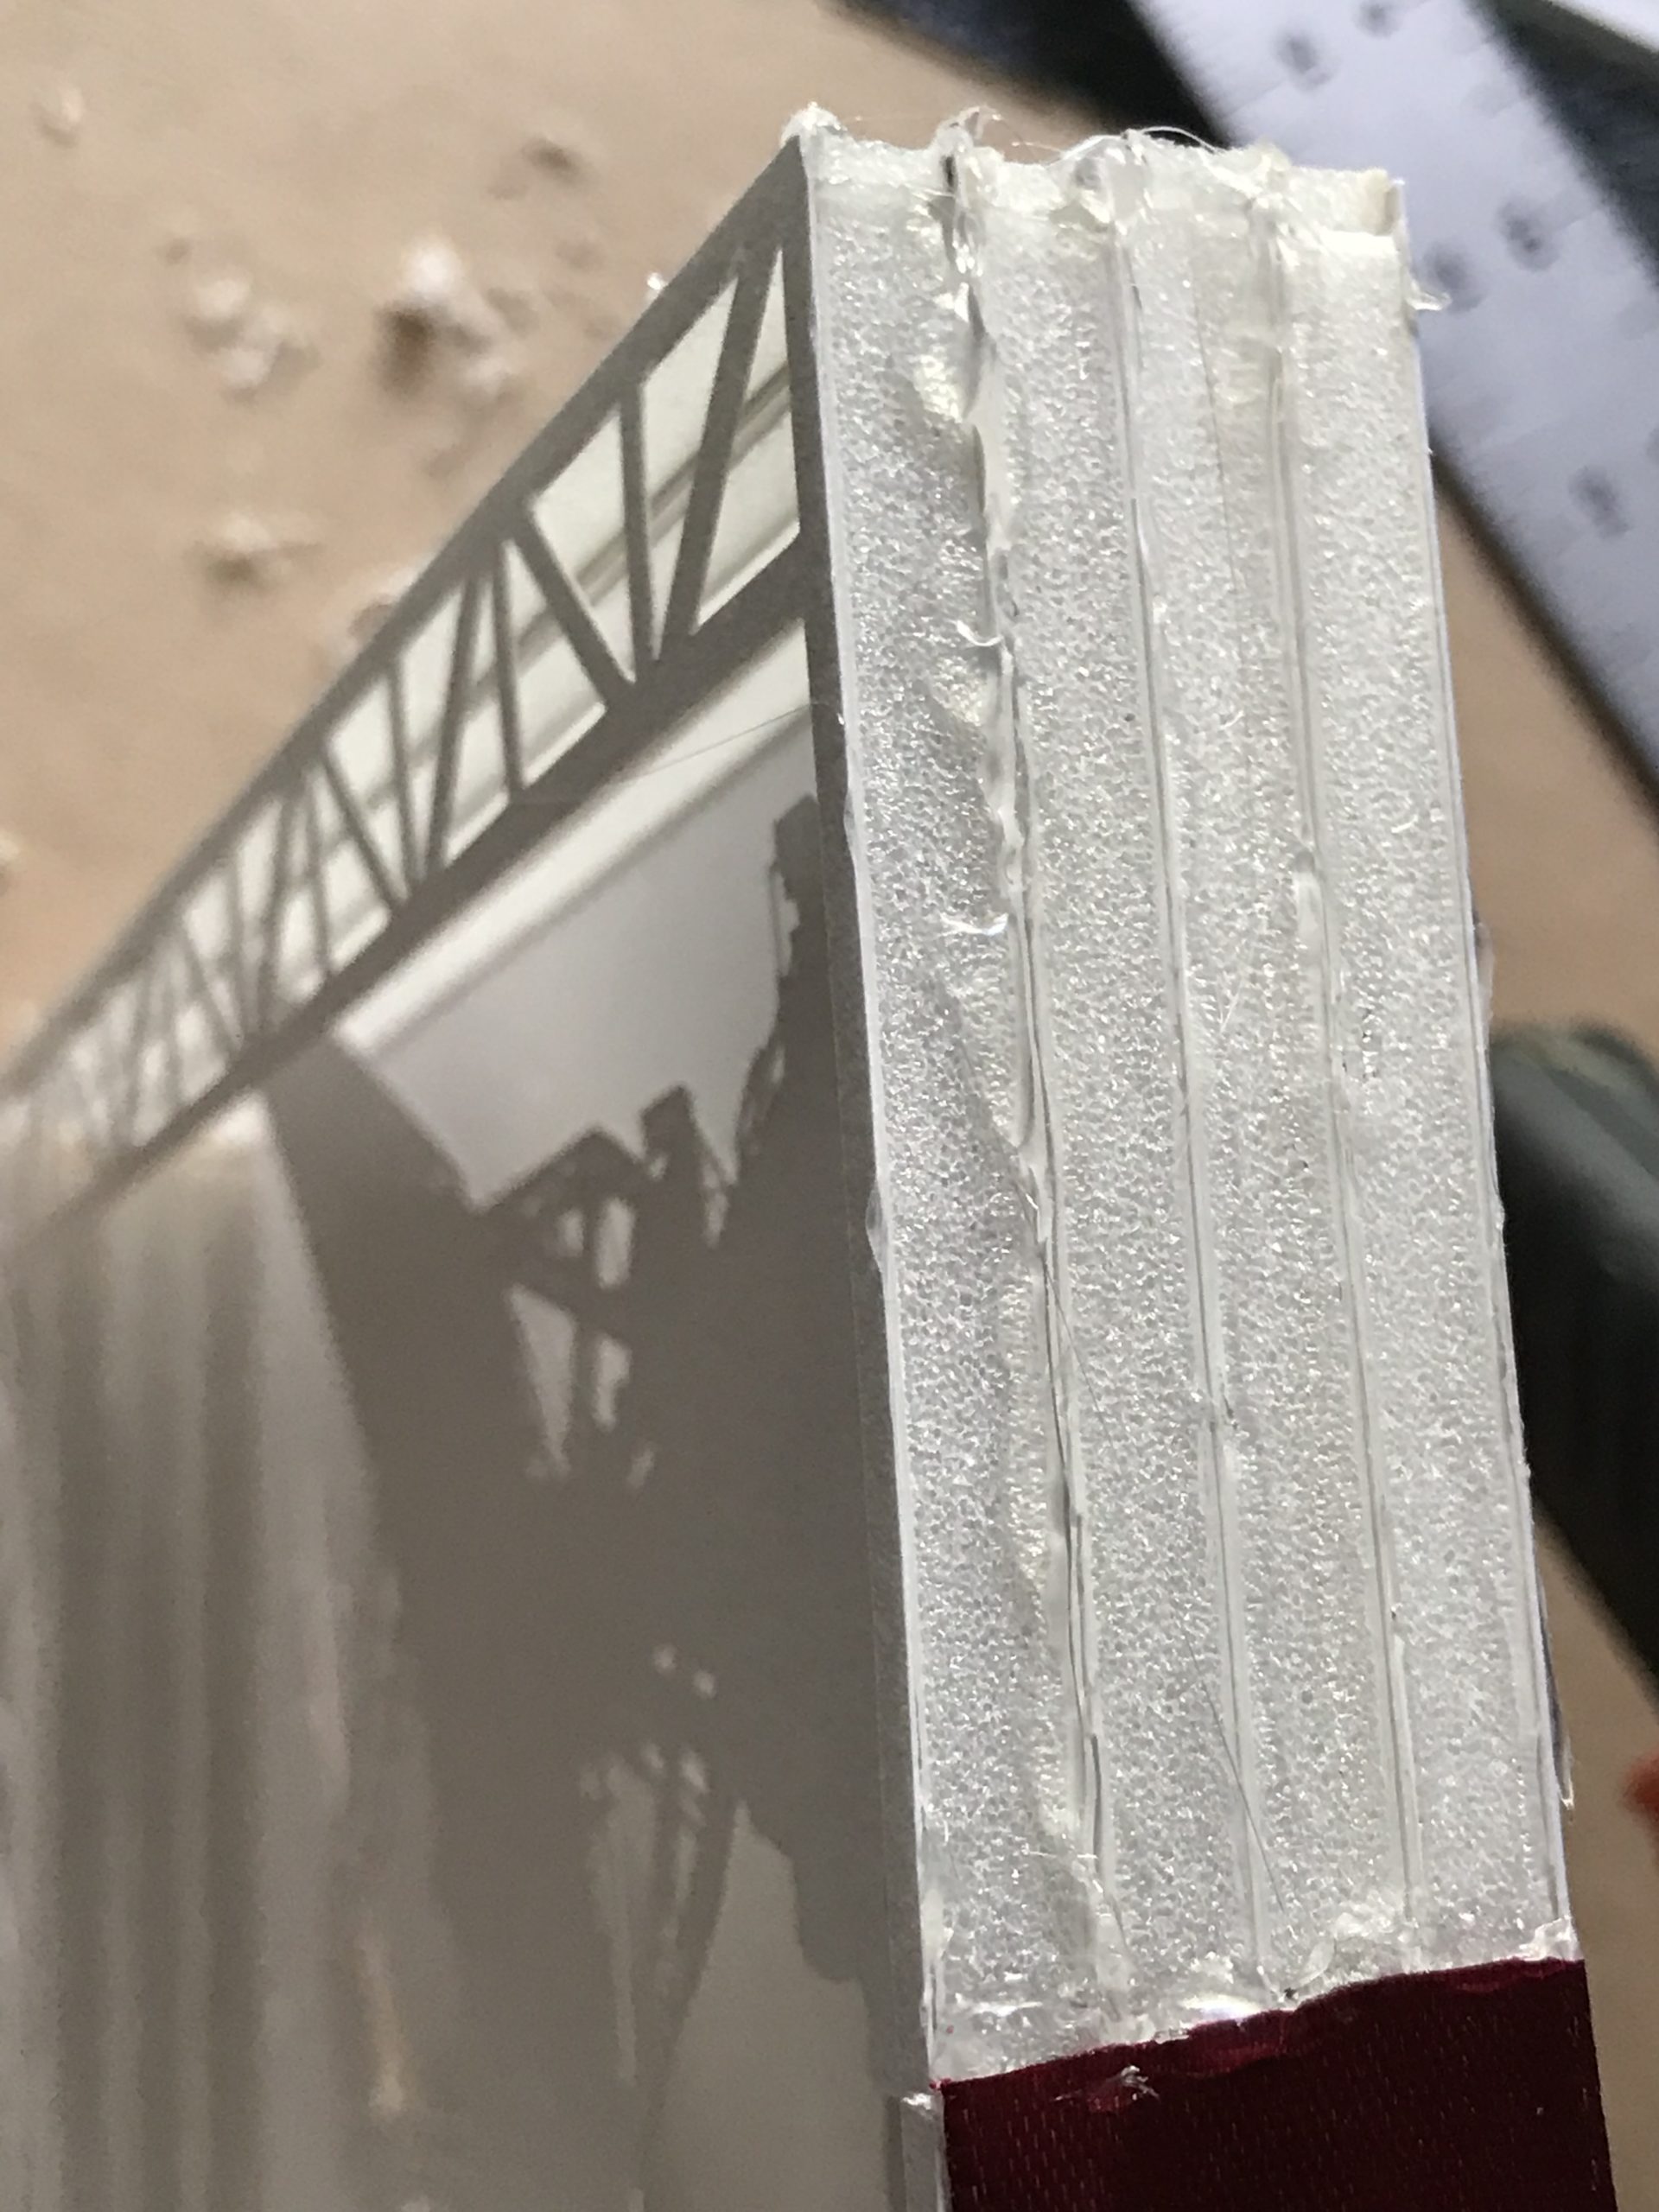
Sandwiching the layers 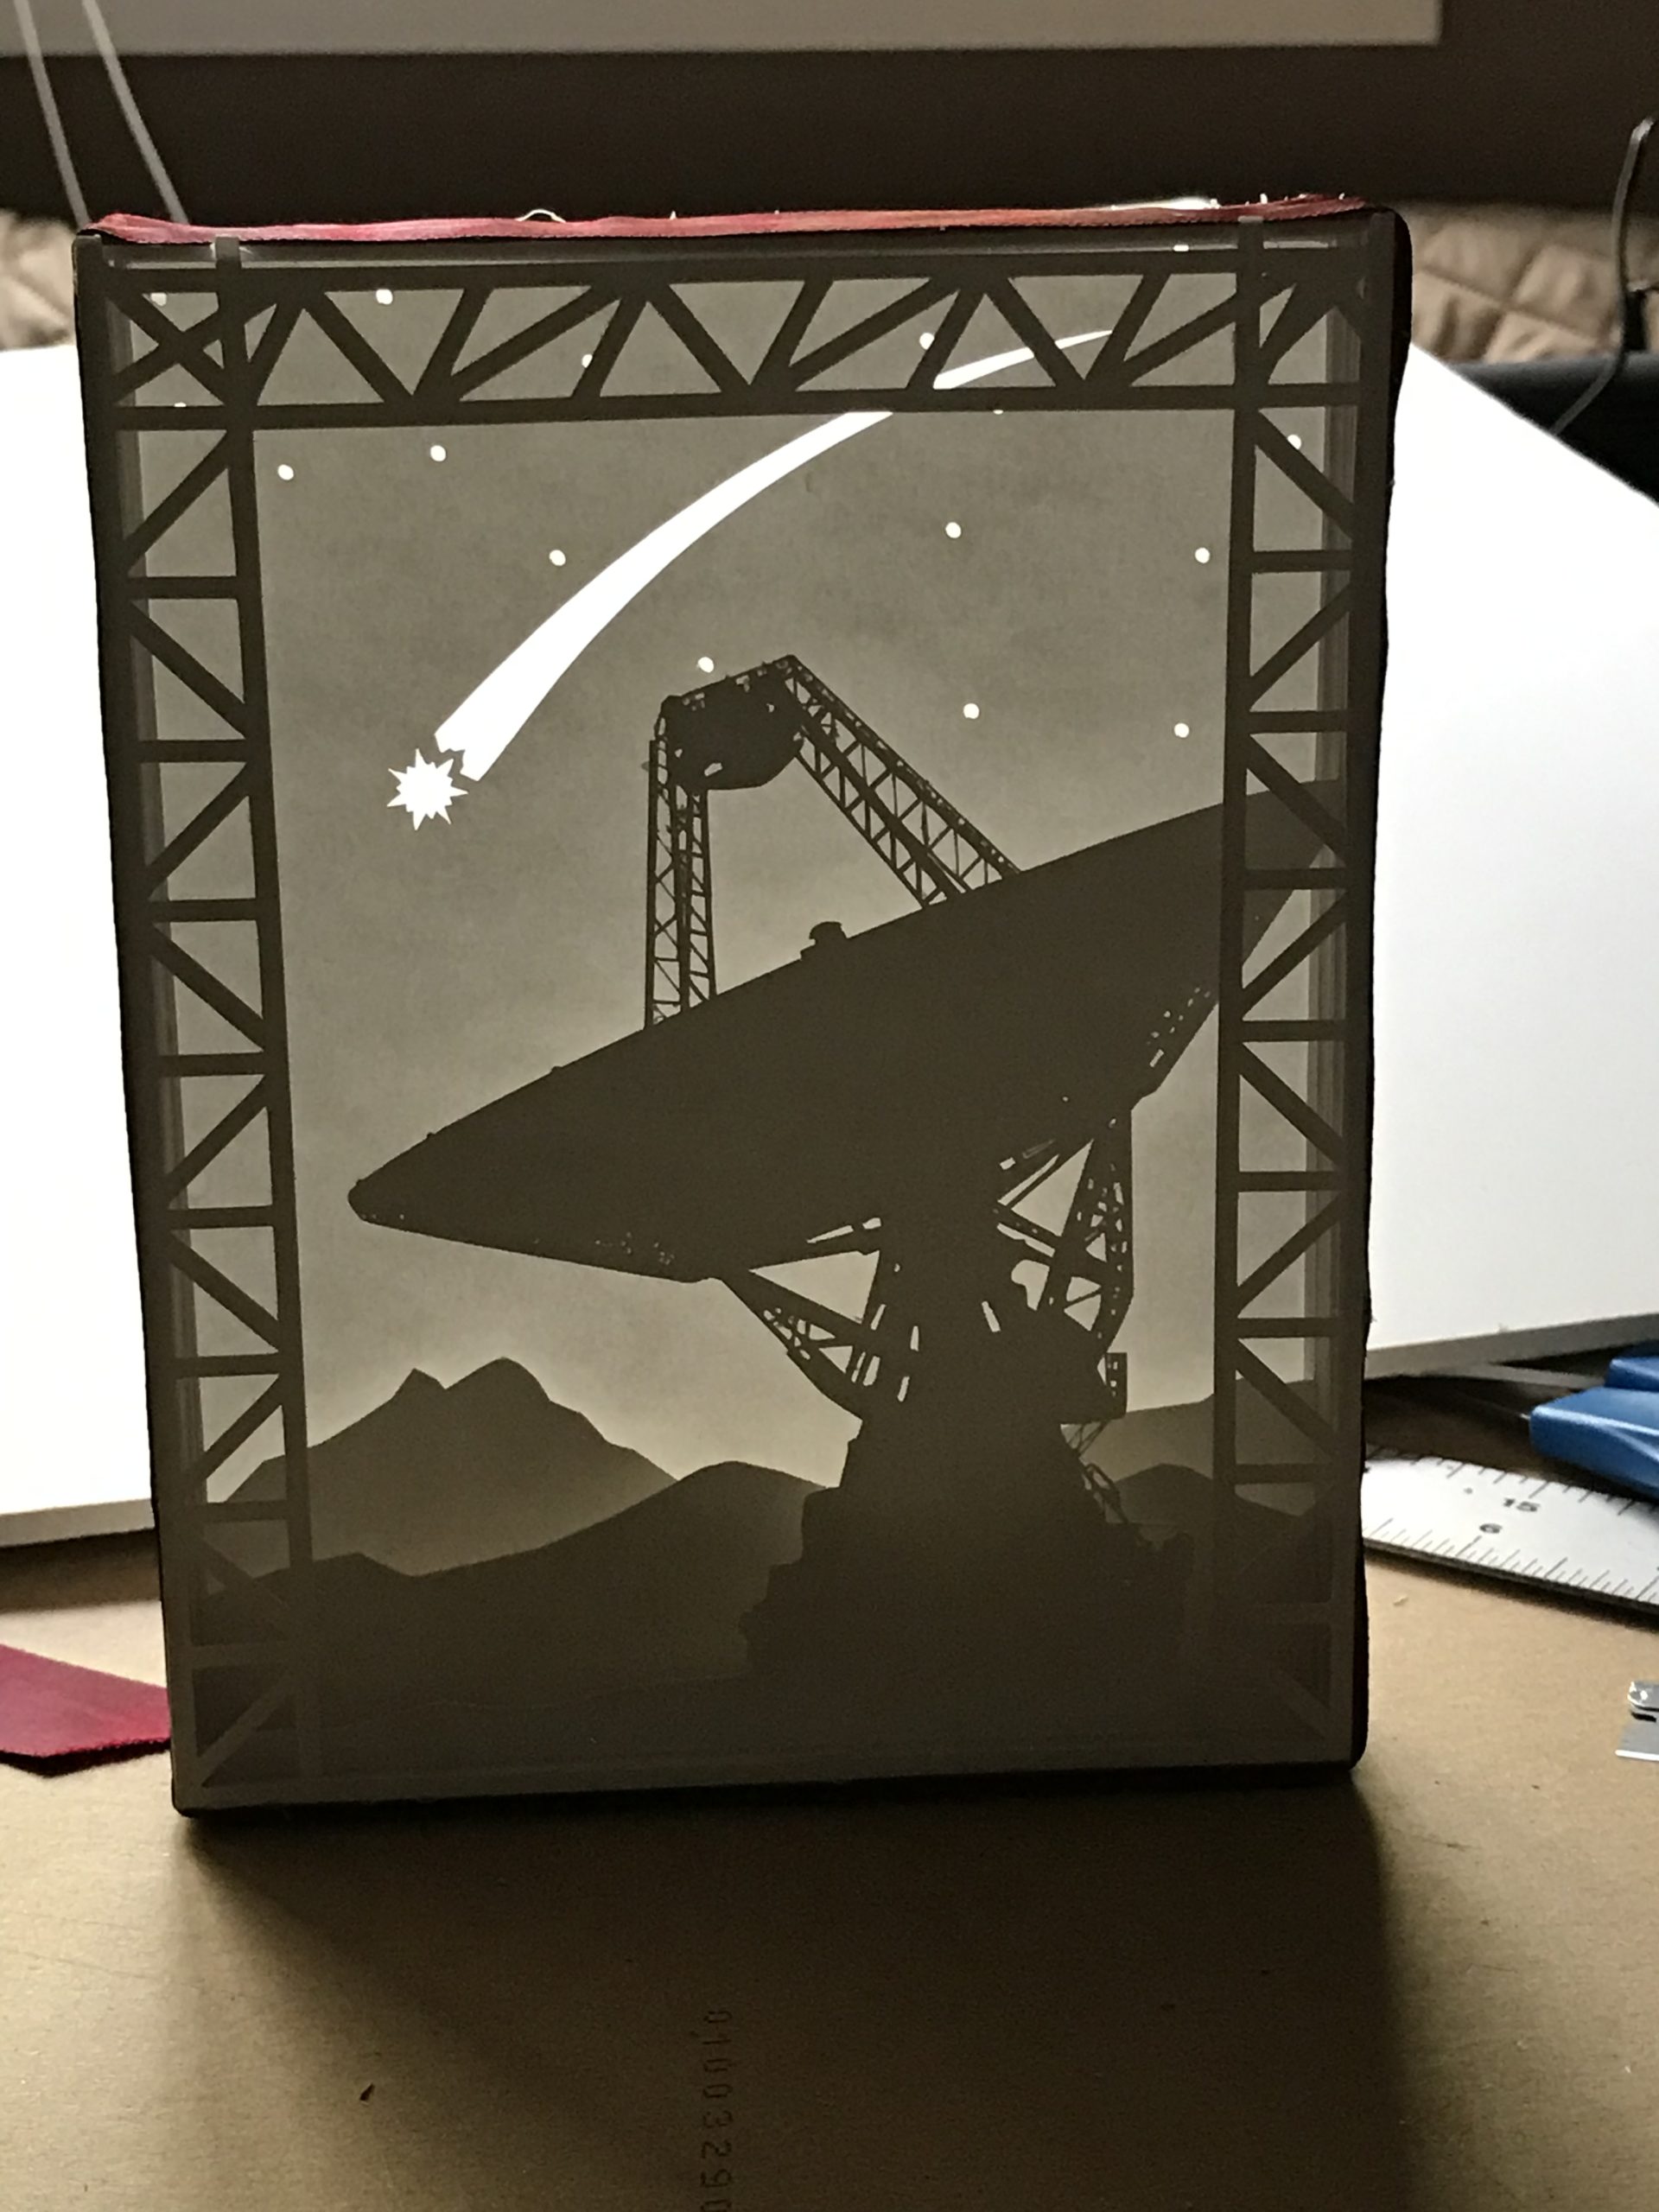
Resultant card, with light coming through it