
DIY Split Keyboards: Your Next Maker Rabbit Hole
As someone who had never soldered before (to the point where I didn’t realize the L was silent), I didn’t expect to love building my split keyboard so much.
If you want a split keyboard, you generally have a few options:
- Buy a pre built commercially available keyboard (most expensive, but most convenient). If you want to customize switches, make sure it’s hotswappable.
- Buy a DIY kit with a partially assembled hot swap PCB – this means you have to do very little soldering and you don’t have to source materials yourself aside from switches and keycaps.
- Buy a fully DIY kit – this means you have to solder but you don’t have to source materials yourself aside from switches and keycaps.
- Source components yourself using a build list from an open source project – which means you have to solder everything and source components yourself.
I opted for the last option. For me, this project was out of necessity: I was struggling with shoulder and wrist pain while working at my computer, and when I researched ergonomic keyboards, I ended up going down the rabbit hole to discover the plethora of open source split keyboard projects available. The commercially available keyboards didn’t meet my needs, which were:
- Wireless/rechargeable
- This meant I had to opt for a build utilizing ZMK firmware
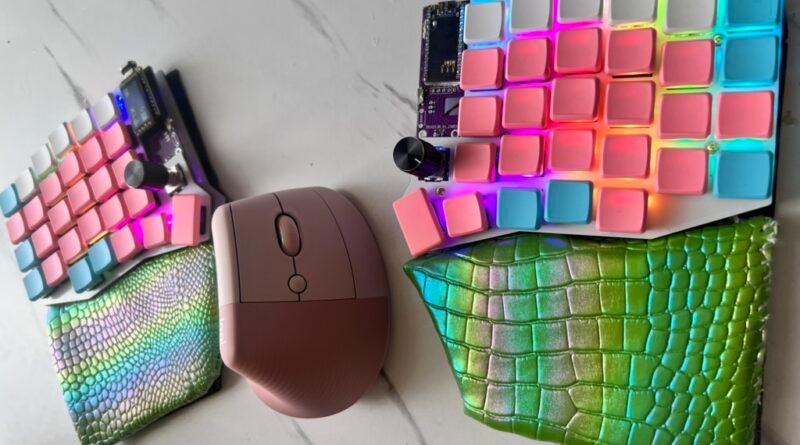
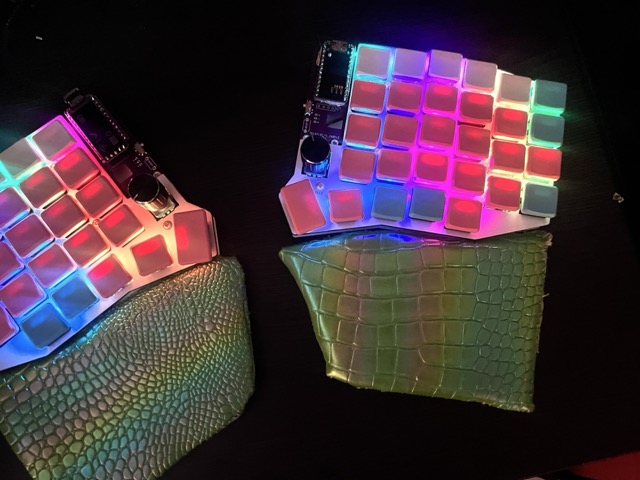
- RGB led underglow (generally discouraged for wireless builds, but I wanted to have something to add pretty ambiance to my desk and make working marginally more enjoyable)
- Small-hand friendly (which was more difficult to find than you’d expect, but in hindsight not all that surprising since tech is often designed by and for men!)
- Low profile
- This meant I had to opt for a build with Choc switch support
- Near-silent switches (partially to reduce noise on Zoom calls, partially to ameliorate finger fatigue)
- The new Choc nocturnal switches were much more silent than any MX switches
Finding a split keyboard for your needs
The resources page in the r/ErgoMechKeyboards wiki has a lot of helpful info. The Golem Keyboard Project and kbd.news are also fantastic. Here are some of my favorite resources:
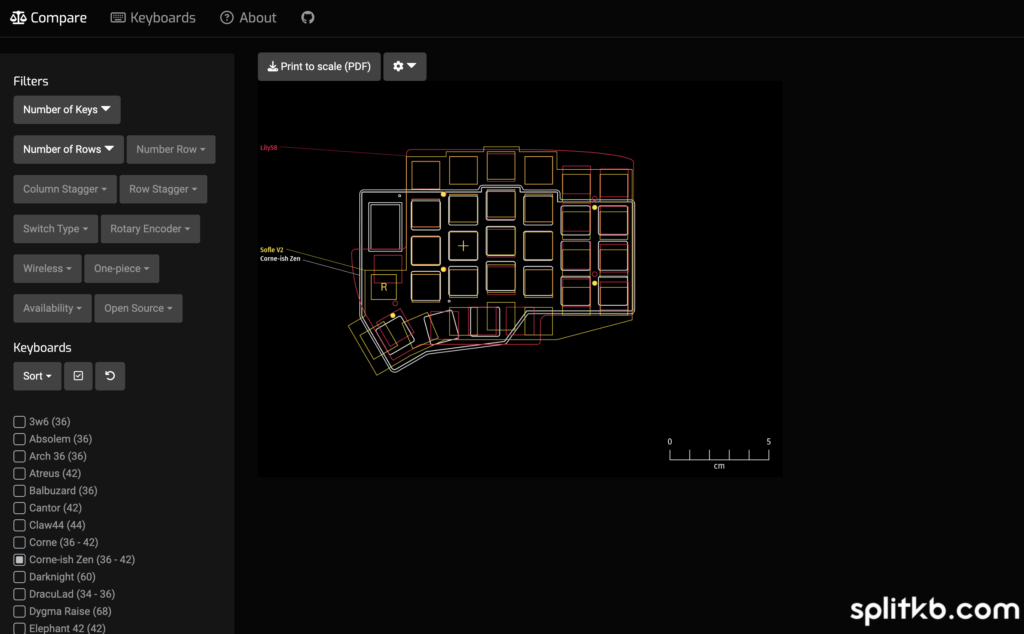
Layouts: To find the best layout for you, use SplitKB’s comparison web app to visually compare a few selections, then print your favorites at 100% scale to see what type of stagger feels best for your hands.
Directories: The Golem Keyboard Project has a Split Keyboard Database where you can filter by almost any criteria you’d need. The Awesome Split Keyboards github repo readme also has quite a few, but hasn’t been updated in a few years. You can also search the web – I searched for a wireless sofle choc with RGB, so I found mine through the ErgoMechKeyboards subreddit.

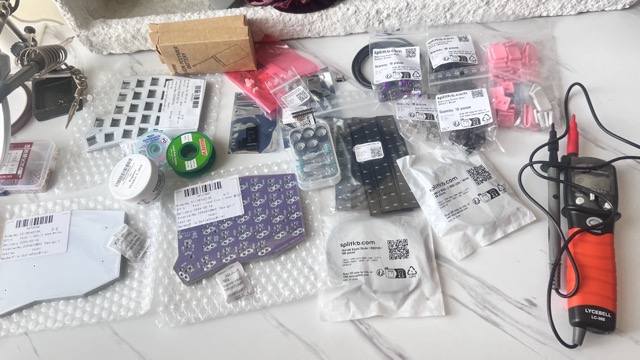
Buying Supplies
- Less Common variants: If you’re going for a less common variant like mine, and you’re not an electrical engineer, ensure the build guide is comprehensive (like this), with detailed info about the components needed and what alternatives do and don’t work.
- https://kbd.news/vendors this is a vendor list where you can filter by what they sell and where they ship from. It’s not 100% accurate but can point you in the right general direction!
- Electrical components: AliExpress is great for buying the electrical components – I bought the ones for my first build from keyboard material vendors but bought from AliExpress for the second build with equivalent quality. I also have way more slide switches and reset buttons than I’ll ever need if you want some!
- Sockets: Always opt to socket your MCUs and displays if possible! It’s a little more expensive but if you fry or your MCU it’s a lot less trouble to replace it if it’s socketed. (I absolutely hated the expensive and fragile teeny tiny Mill Max pins and used spring sockets for the second build I made, but they’re slightly less secure). Hotswap sockets, if compatible with your build, are great for being able to customize switches. I use different switches for A-Z keys, number keys, and modifier keys as a tactile reminder of where things are since I don’t have a legend on my keyboard.
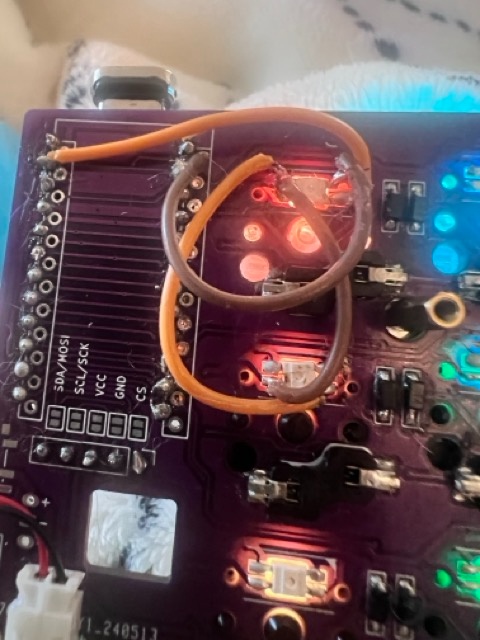
- PCBs: If going the DIY route, you can get PCBs fabricated. I used JLCPCB, but Osh Park and PCBway are other options. If the build guide includes gerber files for bottom plates, note that you can 3D print a case or laser cut a bottom plate instead. Top plates can also be laser cut, but be mindful of the width as it’s important that the switches fit into the top plate and the top plate sits flush against the PCB. Some common layout PCBs (unmodified Sofle, Corne, etc) are available on AliExpress.
- MCUs: NiceKeyboards – if you also opt to build yours yourself and you want to go wireless, the nice!nano v2 microcontroller is the most popular option. Their site links to authorized vendors – otherwise you can get the clone (SuperMini NRF52840) for pretty cheap on Ali, which is what I did for the second build. You don’t actually need to know how to code here unless you want to, you’re just moving the firmware file to the right folder. Some kits for vendor-specific closed source variants of open source builds come with these already pre-flashed with firmware.
- Soldering iron: please do yourself a favor and get the Pinecil. It’s so much easier to use, heats up quickly, and has precise temperature control and auto sleeps using an internal accelerometer. I used a cheap soldering iron for my first build and ultimately would have saved myself so much time and trouble by using a Pinecil in the first place.
- Troubleshooting with a multimeter: Upload the PCB to KiCad to download the schematics to reference if you need to troubleshoot. Keyboard supply vendors will sometimes provide schematics for MCUs and electrical components if you can’t find them online. The discord communities have also been helpful for me.
Adjusting to your new keyboard
Practice: There is an adjustment period to be able to return to your normal typing speed. I tried a lot of typing practice games and websites, and ultimately the only one I found truly helpful was keybr. Give it a couple weeks. You’ll still be able to use your normal laptop keyboard after but it’ll feel funky at first.
Print your layouts: If you don’t have legend keycaps (aka you’re using blank keycaps) I recommend printing out your layouts and tape them to the wall next to your monitor or on your desk. The Keymap Drawer web app is super easy to use – just paste the URL to your keymap in the github repo for your keyboard and print it.
Adjust your layouts if they’re not working: You can connect a keymap editor webapp to your github repo to make it easier to adjust the keymap for your ZMK keyboard. ZMK also recently released ZMK Studio for live editing without having to re-flash your split keeb’s master side MCU, but it doesn’t support macros yet.
What’s Next: Going Deeper Down the Rabbit Hole
Once you’ve had a taste, you may find that you want to know and do more with this hobby. For me, I’m currently working on:
- modifying the firmware to trigger an animation to play the display when I’m typing at a certain speed on my keyboard
- 3D modeling a magnetic case to replace the bottom plate
- designing and either printing or laser cutting a stand to fit over my Mac’s keyboard while still providing shoulder-width distance between the split sides.
I’m also interested in setting up a custom controller-shaped macropad with rotary encoders and 5-way switches for playing Stardew Valley on Steam, and designing my own split keyboard that’s shaped like a butterfly with my own hand drawn art printed on the PCB.
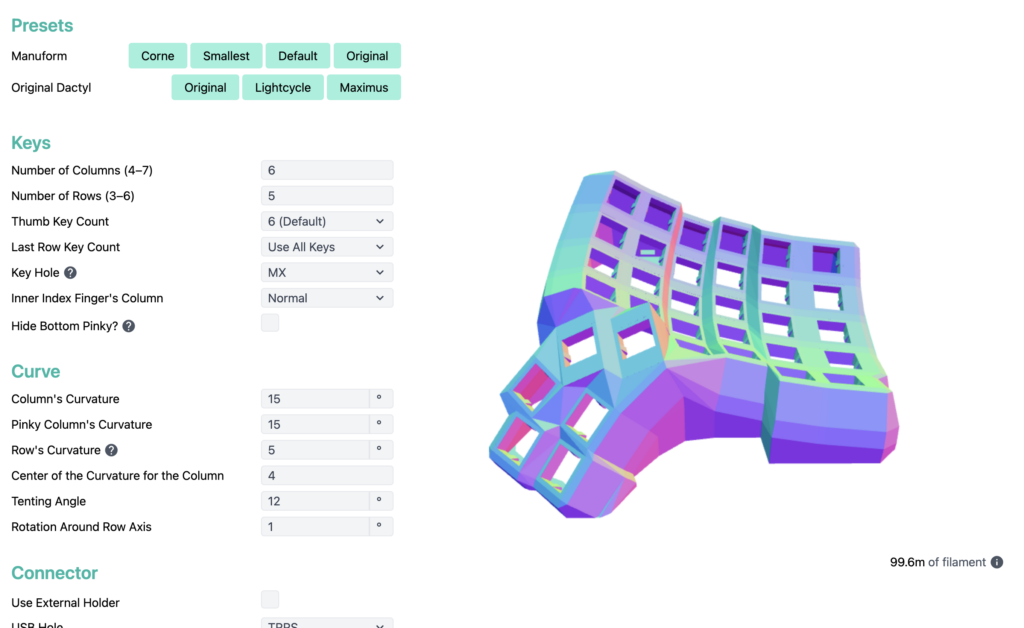
There’s also a partially handwired true custom build called the Dactyl which can use flexible PCBs and a 3D printed case that’s custom fit to your hands. There’s even an online generator you can play around with for the 3D printed case, which provides the infrastructure for the keyboard.
The resources and online communities are bountiful, so it’s exciting to be able to access such open source info and guides that others have kindly made open source! Most of all, I’m glad that I learned how to solder, which I feel is an invaluable life skill that opens up so many hobbyist doors.