
Take Apart Tuesday No. 6 – HP 1120C
So a bit of a rewind on Take Apart Tuesday. This is the write up for February 9th. I was going to skip it and just go straight for hard drive we dismantled on the 16th, but a potentiometer actually smoked (sorry, no flames). It seemed like a requirement to share what that happened.
So this week a bit on optical encoding, then some on stall torque and how it relates to component power ratings. Just for giggles I threw in some DC Motor code on the Arduino at the end. So keep reading… The Case of the Smoking Potentiometer
Encoding Speed and Location with a DC Motor
So the original plan for for the HP DeskJet 1120C was to crack it open, swap out the ink cartridge for a pen and then control the stepper motors based on sensor data to create a custom output device that actually gives you an instant hard copy datalog like a seismograph or lie detector. It is a fun thing to do with old printers.
The tricky part is that once the 1120C was open it wasn’t actually a stepper motor controlling the horizontal location of the print head. Instead this printer uses a method called optical encoding and a plain old DC motor to determine where the print head should be.
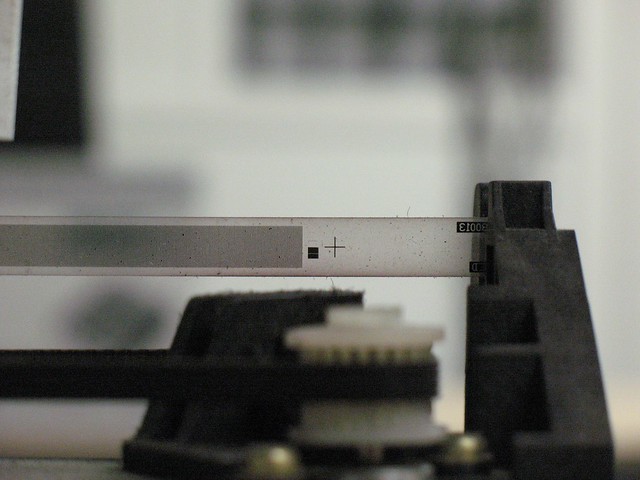
A strip of plastic with fine lines feeds past an IC called the Q9864, a quadrature decoder. This chip has two outputs that each use sensors to detect the black lines on the strip as they zip past. The spacing between the sensors is such that the readings from outputs are offset, 90° out of phase, apparently. This allows the processor receiving the data to determine which direction the print head is moving. The output is TTL compliant. (TTL: Transistor to Transistor Logic, it means this IC can directly talk to other similar integrated circuits with the understanding that “1” is conveyed by generating a voltage level somewhere between 2V and 5.25V and “0” is represented by any voltage under 0.8V)
Now to attempt hacking into this chip it would be best to have an Oscilloscope, etc, but I haven’t even covered basic DC motor stuff and we have a smoking potentiometer to get to. I’m going to take the dodge and point people to a project that was just in Issue 20 of MAKE called the Autophenakistoscope.
Why point to this project you ask? Well the Autophenakistoscope is a phenakistoscope (early moving-picture device) that uses an infrared emitter and detector pair in conjunction with regularly placed slits in a moving cardboard wheel in order to control the speed of a motor. The Q9864 with it’s strip is essentially an advanced version of this setup so looking at the code MAKE has published is a good way to figure out what to do with the data once you’ve gotten it anyway.
But the thing I haven’t covered is, “Why would HP do this to me and ruin my fabulous quick project idea?” Um, I mean, “What are the advantages of using encoded motor control over a basic stepper motor?” Simply stated, motors sometimes slip so it is good to have an independent outside source confirming that the motor is where you think it is. Many CNC routers, printers, etc. opt for this type of encoding rather than taking on faith that a stepper will always be on it’s best behavior.
Direct DC Motor Control And What can Go Wrong
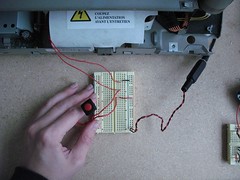
So instead of just hijacking another stepper, like we could do with the paper feed stepper, we needed to build a circuit for this new motor. If you remember, the motor in our toothbrush was a DC motor and the circuit consisted of a battery, a switch and the motor. This is the most basic circuit and it is the one we recreated to verify that the motor worked and what voltage it needed to move. Following the advice I gave in TAT0005 I started with my lowest available voltage – 5V from an Arduino board powered from am external power supply. When that failed to move the motor at all, the next available power source was a 9V battery. A straight from the package 9V moved the motor hesitantly. The problem here may actually have been a current/torque issue since the motor was still attached to the rubber belt and the print head. What finally worked cleanly was a 12V/1Amp supply.
Video Recreation:
The Best Laid Plans
Off and on isn’t always fun enough, though. The way to change the behavior of a motor is to change the way it’s getting its power. To change direction – swap the position of the leads. To change speed – change the amount of voltage across the leads. To provide more torque – increase the current available.
I wanted to quickly demonstrate speed control. To change the voltage available to the motor with a fixed voltage power supply you can add a resistor in series with the motor. This resistor will burn off some of the potential energy/voltage as heat, decreasing what is available to the motor. How much energy it steals from the circuit is related to how big of a resistor it is; a 100 Ohm resistor will drop the voltage a lot less than a 10k Ohm resistor. You can calculate all this with Ohm’s Law which I’ll use again later…
If you want to change the speed as you go the fixed resistor can be replaced by a variable resistor or rheostat. All About Circuits has a very good explanation of how this is done using a potentiometer.
And…. well, if you watched the video at the top of the post, you know what happened.
Pot Smoking
So, why did the potentiometer smoke? A few things, but the most important was that I failed to know my component. What do I mean by that? I mean that I grabbed a potentiometer out of my kit and ignored its power rating because I thought for a couple of seconds it wouldn’t matter. Wrong!
The three things I should have had in mind:
- Resistors dissipate energy as heat
- Resistors/Potentiometers are given power ratings based on the combination of voltage and current they can handle before they get immensely hot and fail. This is given in Watts (Watts = Volts * Amps)
- Most of my pots are cheap 1/4 to 1/2 Watt jobs meant for use with a micro-controller
- Motors draw A LOT of current when they are stalled. Their resistance drops because no counter EMF is being generated to push against the current supplied by the power supply and Ohm’s Law tells us a drop in resistance at a a steady voltage will lead to a rise in the current. (V=I*R) (How much current are we talking about?)
- I was forcing the motor to stall. Repeatedly.
- Plastic burns.
So as the resistance in the potentiometer increased, the voltage to the motor dropped, and its speed dropped. The motor’s resistance plummeted faster than the resistance in the pot increased. The whole system started drawing more current. This current was being pulled through the increased resistance of the pot… well to sum up it is entirely possible I was dragging a full amp at 12 V through a 1/4 W resistor set to its maximum resistance – hence smoke…
So how do all those cheap electronics work?
A potentiometer that can handle 12.5 W can run between $15.00 to $30.00, depending on the quantity ordered. Additionally, dropping voltage to a motor through resistance wastes a lot of energy and creates a lot of heat. For these and other reasons a rheostat directly in series with a DC motor of any strength is not the method of choice for controlling speed. What frequently gets used instead is something called Pulse Width Modulation. This involves separating your control circuit (microcontroller/other pulsing IC) from your load circuit (motor) and using a microcontroller or something like a 555 timer to turn the load on and off very fast. The ratio of on time to off time controls the speed. More on, faster. More off, slower.
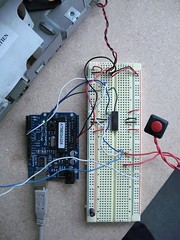
FYI – separating the logic from the load makes switching directions easier because power and ground aren’t hardwired to the leads of the motor directly. For the sake of symmetry with TAT0004 I’ve duplicated the Stepper Motor Random Motion program as an example.
Circuit Board:
I messed around with controlling DC motors using the encoder strips and sensors from ink jets a while ago. I wrote some PID code for the arduino to make it all work. There is better code in the an arduino PID libarary these days, but hopefully the info is still useful. http://abigmagnet.blogspot.com/search/label/PID
GREAT! I’ll have to try to check that out!
I too have some Arduino-based control code for you (limited to PD only):
http://subzonepen.blogspot.com/2009/06/dc-motor-closed-loop-pd-control-code.html
Pingback: Reverse engineering old printers « Toys and Gadget - Just another WordPress weblog
Pingback: Reverse engineering old printers | Products & Tech News
Do you have a pictorial or schematic for the connections to the H bridge and Arduino. I am in my 70’s and the picture on the site is not quite clear enough. Going by the code did not help. Also, if time permits, I could not find out how to determine the min/ max PWM values for a 6 volt 150 ma motor. Thanks very much.
Cancel request! I finally figured it out which is generally better for learning this new language for an old dude. Great sketch and it helps me to learn! Thanks for sharing.
So glad you figured it out!
For future reference for others: http://itp.nyu.edu/physcomp/Labs/DCMotorControl