
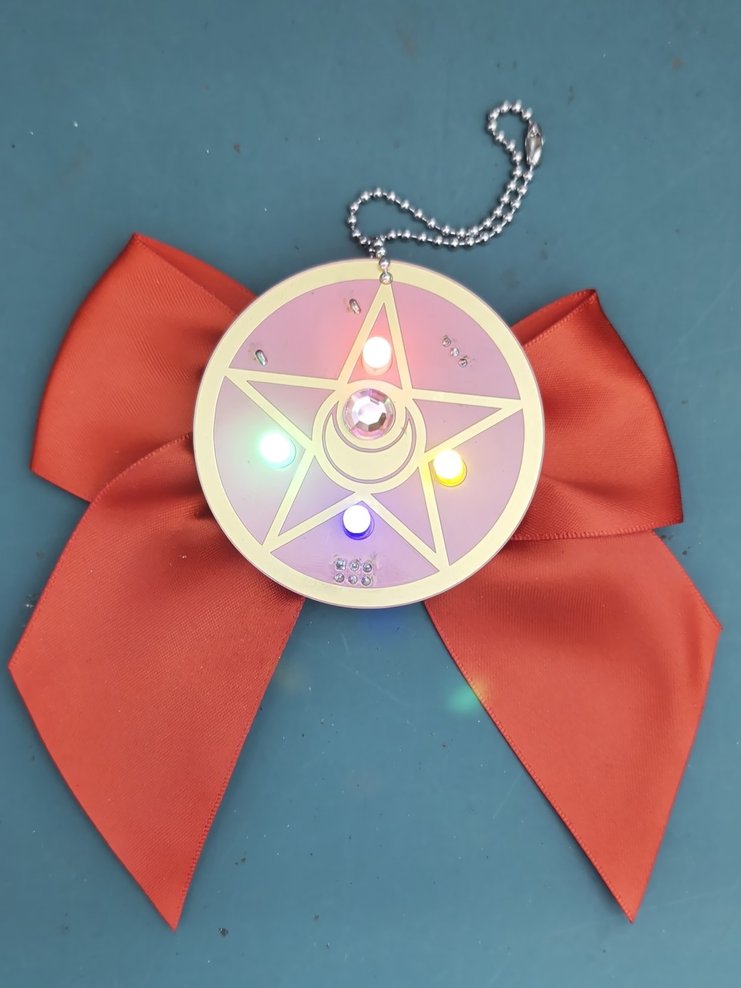
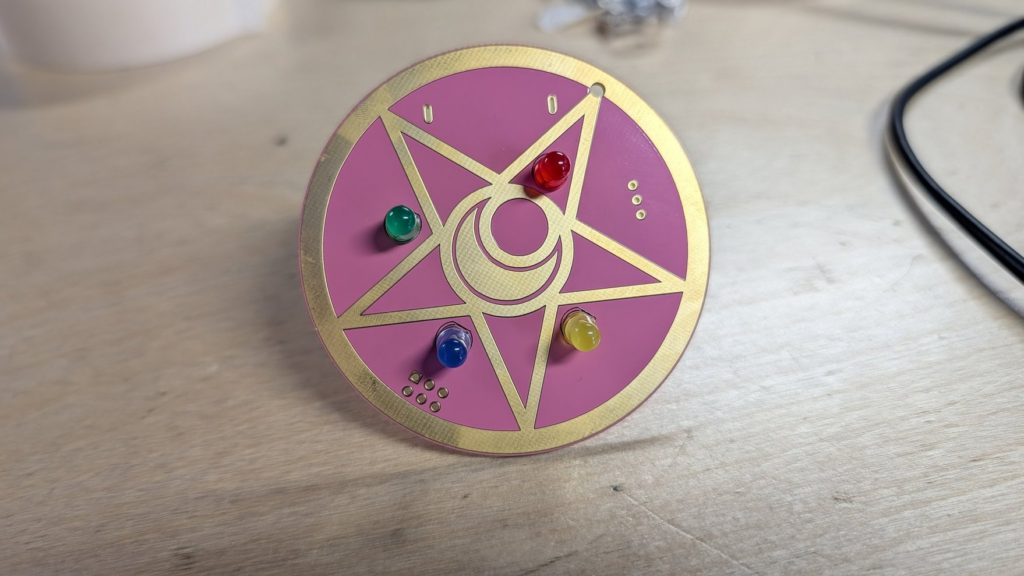
Sailor Moon PCB Keychain
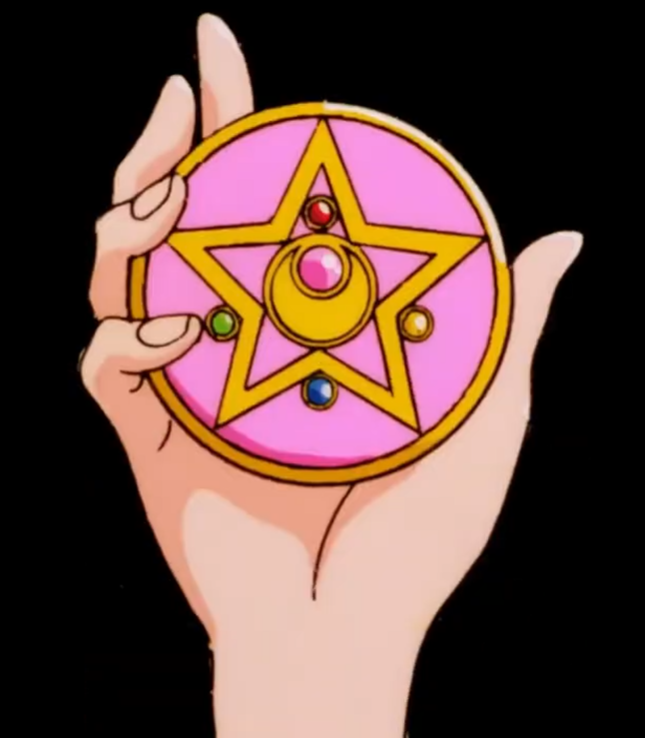
This past winter we received an opportunity from PCBWay where they offered to produce any boards we designed for a learn to solder class. I decided to live my magical girl dreams and design the Crystal Star Compact from Sailor moon!
Want to make your own? Reach out to me at instagram.com/alicenlewis and I’ll send you the files and what to buy.

Getting Started
When soldering components of different heights, always go from shortest to tallest. It helps keep parts flush with the board as you work.
This badge features an ENIG gold-plated finish. While this finish is typically used to prevent corrosion, here it’s also used decoratively to give it an extra shiny look. Just a heads-up—solder will stick to those gold areas just like it does to the pads. Once solder touches them, they’ll turn silver permanently—there’s no way to restore the gold.
Soldering Order:
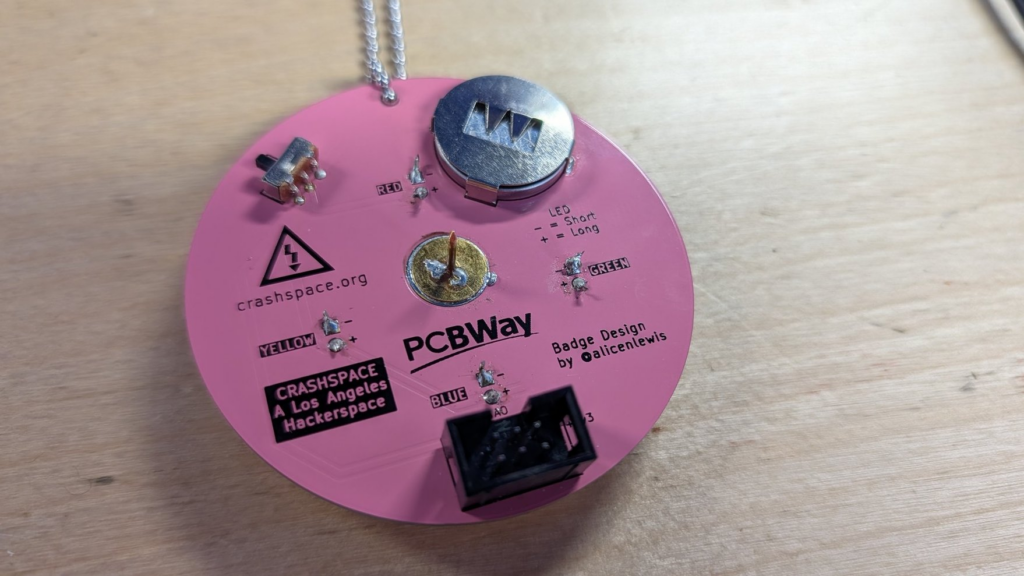
- Switch & Battery Holder
- SAO Port
- Pinback
- LEDs
- Keychain & Jewel
- Bow
1 – Switch and Battery Holder
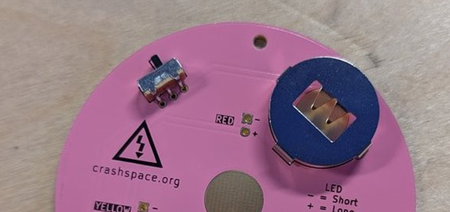
- Insert the switch and battery holder on the back side of the PCB.
- You can use a small piece of tape to hold them in place if you’d like—they tend to fall out when you flip the board over.
- Flip the board and solder the pins from the top side.
2 – SAO Connector
What’s an SAO?
SAO stands for Standard Add-On—a standard used at hacker and maker events for adding small accessories to larger conference badges. By installing this connector, you’ll be able to plug your Crashspace badge into another badge that supports SAOs, like the big ones handed out at events.
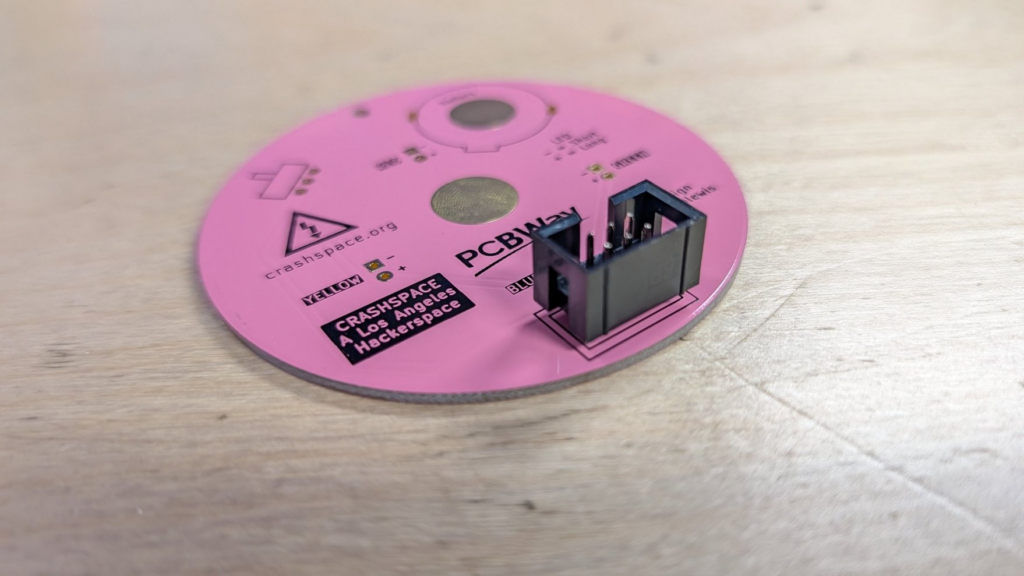
Installing the connector:
- Make sure the notch on the SAO connector matches the outline on the PCB.
- Pro tip: Only solder one pin first. That way, if the connector isn’t sitting flat, you can easily reheat and reposition it.
- Once it’s level, solder the rest of the pins.
3 – Pinback
- These photos will be from another CRASH Space badge, but the principles are the same.
- Start by adding some solder to the pad at the top of the badge—spread it around for even coverage.
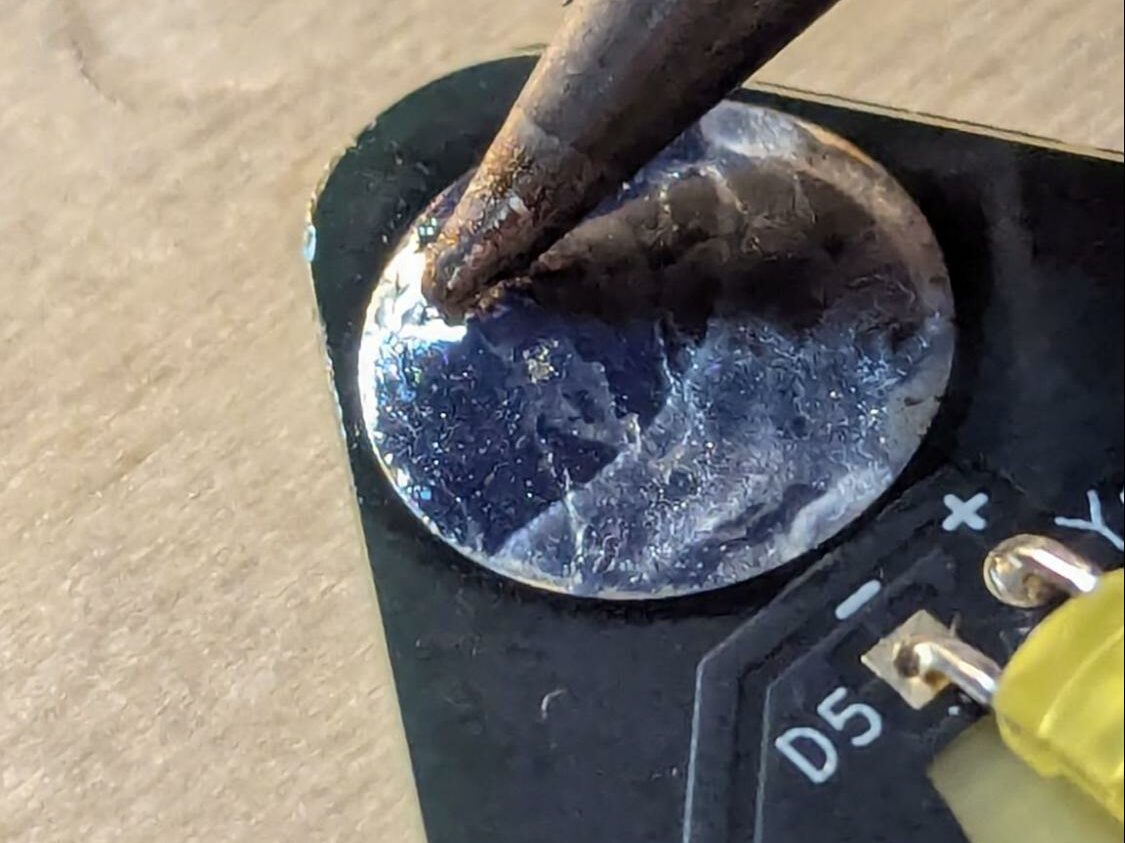
- Remove the clasp from the pinback and place it on the pad.
- IMPORTANT STEP: Rest your soldering iron on top of the pinback and feed in a small amount of solder so it forms a glob under the iron. This helps transfer heat to the pinback. It will not work if you skip this step.
- After a few seconds, the solder underneath should melt. You’ll know it’s done when you see a nice bead of solder all the way around the edge.
- Remove the iron and let it cool before touching.
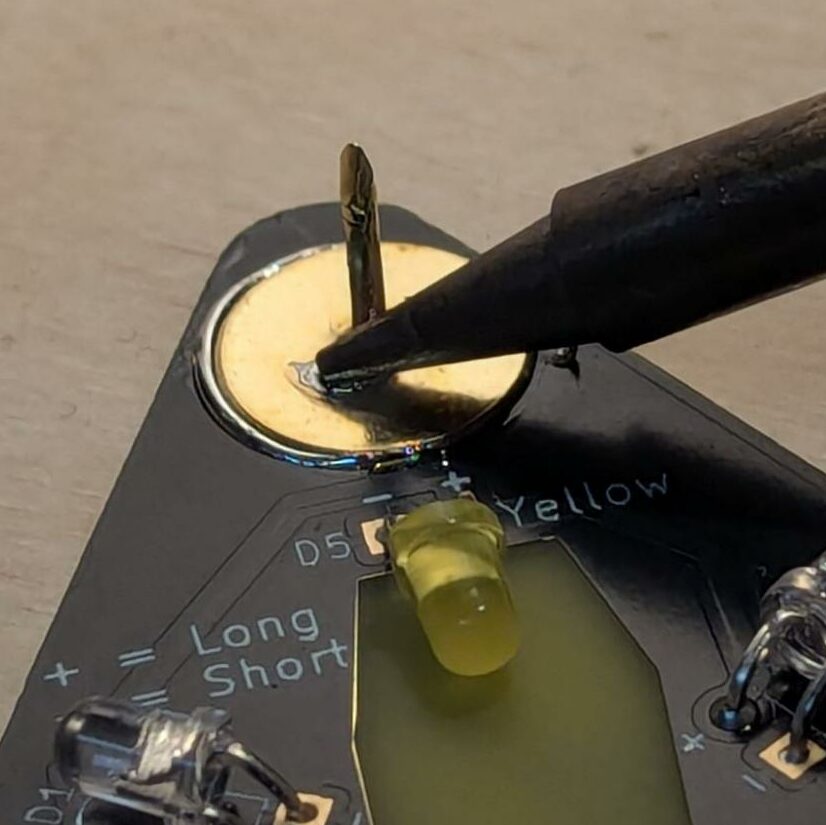
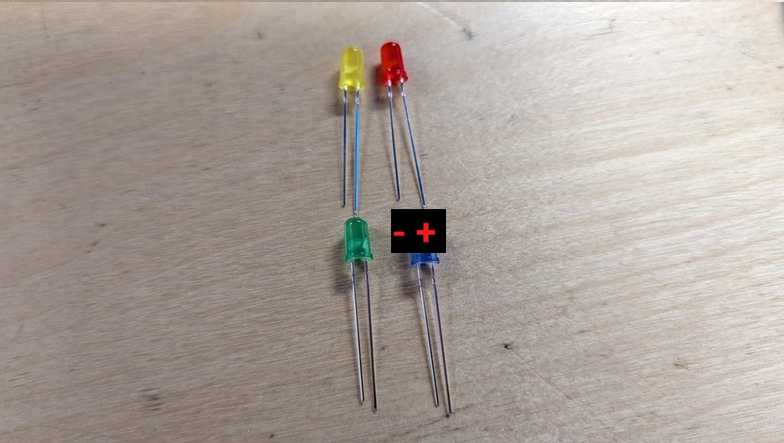
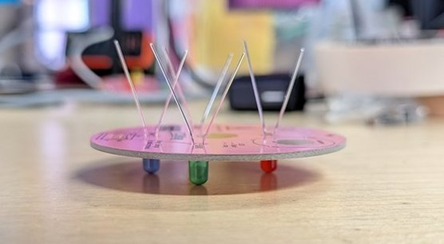
4 – LEDs
LEDs only let electricity flow one way, so they need to be installed in the correct orientation:
- Long leg = Anode (+)
- Short leg = Cathode (−)
Make sure the legs match the + and − symbols on the board.
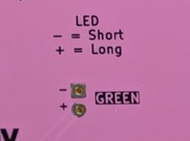
- This is the recommended color order based on the original compact.
- Push all the LEDs in flush with the surface so that the board stays level as you solder.
- Solder each of the legs, but leave them long for now as you’ll want to be able to troubleshoot if you put them in the right direction once you turn it on.
5 – Test the Board
- Put the battery in and flip the switch.
- If it does not turn on, common issues can be:
- Bridges (solder between points that should not be connected)
- The LEDs were put in the wrong direction
- The LED legs are touching causing a bridge
- The battery is the wrong direction.
- If it still won’t turn on, feel free to email alicen@crashspace.org for additional troubleshooting support.
- Once you have tested the board, use flush cutters to cut off all the legs of the LEDs. We recommend holding onto the leg while you cut to prevent it from flying away once cut.
6 – Keychain and jewel
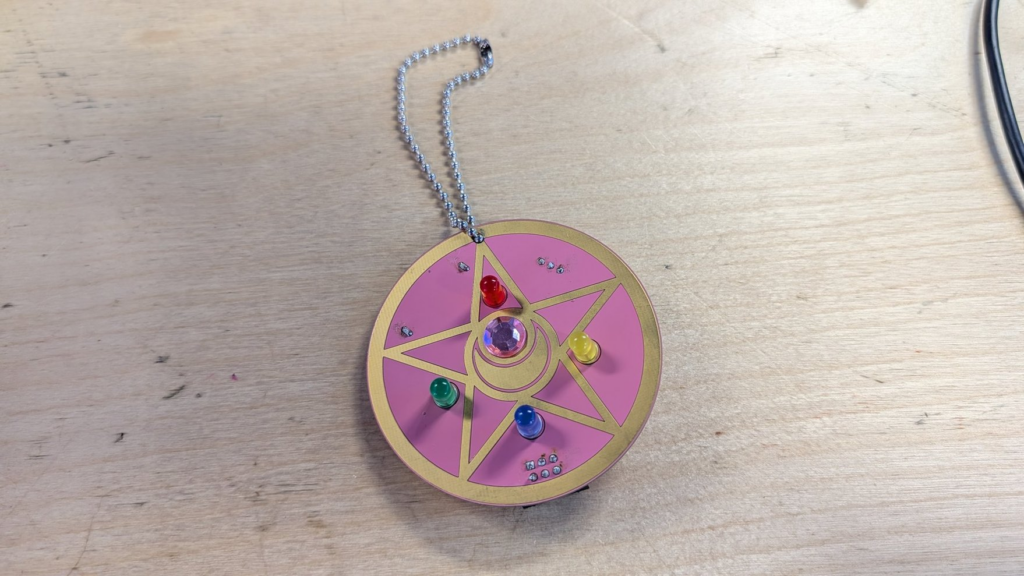
- Put the keychain through the hole in the top of the PCB and close it
- Although the jewel is sticky, we recommend using superglue to make sure it stays attached to the board
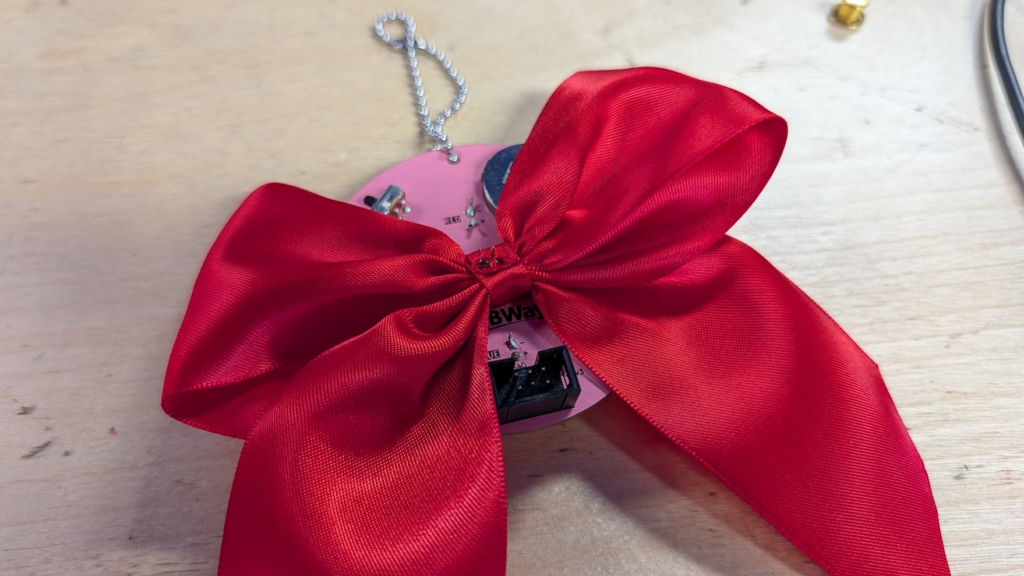
7 – Bow
Push the bow onto the pin. It is ok if it is not able to go all the way through the bow.
It’s done!
Live your Sailor Moon dreams ✨