
Creating Faux Stained Glass with a Laser Cutter
I took on a rather intricate faux stained glass project for a laser-cutting beginner and made a lot of mistakes so you don’t have to!
This blog post will be broken down into the following sections:
- Creating and vectorizing the design
- Laser cutting the material (I used acrylic, but wood would work too)
- “Weeding” the negative space out of the laser cut material
- Painting with colored resin to fill in the negative space
- Fixing mistakes and adding final touches
Materials and Tools (click to expand)
Materials List
- Clear textured acrylic (optional)
- Black acrylic or wood
- Resin (either UV or epoxy, I used both because I eventually ran out of UV, but UV was much easier to handle)
- Resin colorant (can use acrylic craft paint, mica powder, or even eyeshadow)
- Tape for holding resin (especially if not using clear acrylic as a backing)
- Acrylic-appropriate glue (only if using clear acrylic as a backing)
- Iridescent-look textured window cling (optional)
Materials not required, but I used to fix/hide mistakes
- Dimensional paint or liquid leading (I DIYed by mixing Liquitex basics paint, DAP acrylic sealant, and Liquitex Slow-Dri fluid retardant)
- UV-curable clear gel polish
- Alcohol
- The kitchen sink of embellishments: gold foil, iridescent flakes, glitter glue, etc
- Paint markers
Tools list
- Laser cutter
- Silicone applicators and stirrers
- Enough silicone or plastic resin cups for each color in your design
- Something to securely hold and easily cover your resin cups, like a small cardboard box
- Pointy and pokey tools
- Flat tool for burnishing tape
- Craft knife
- Silicone mat or covered work area
- UV light (if using UV resin or gel polish)
Tools not required, but I used to fix/hide mistakes
- Dremel or nail drill with tips for buffing, sanding, polishing, and cleaning (along with an air filter and vacuum for safety and clean up)
- Mini sander and various grit sandpaper
Disclaimer: I was originally going to wait until I made a better example for this blog post but having a clear idea of my mistakes (and there were a lot, because this was my second-ever attempt at using the Epilog) means that a good portion of this blog post covers what not to do. I think that’s useful information as a DIYer, to document loosely informed experiments and explain why things don’t work. However, if you are going to attempt a similar project, find and expand any ⏵ Details found within this post.
Creating and Vectorizing the design
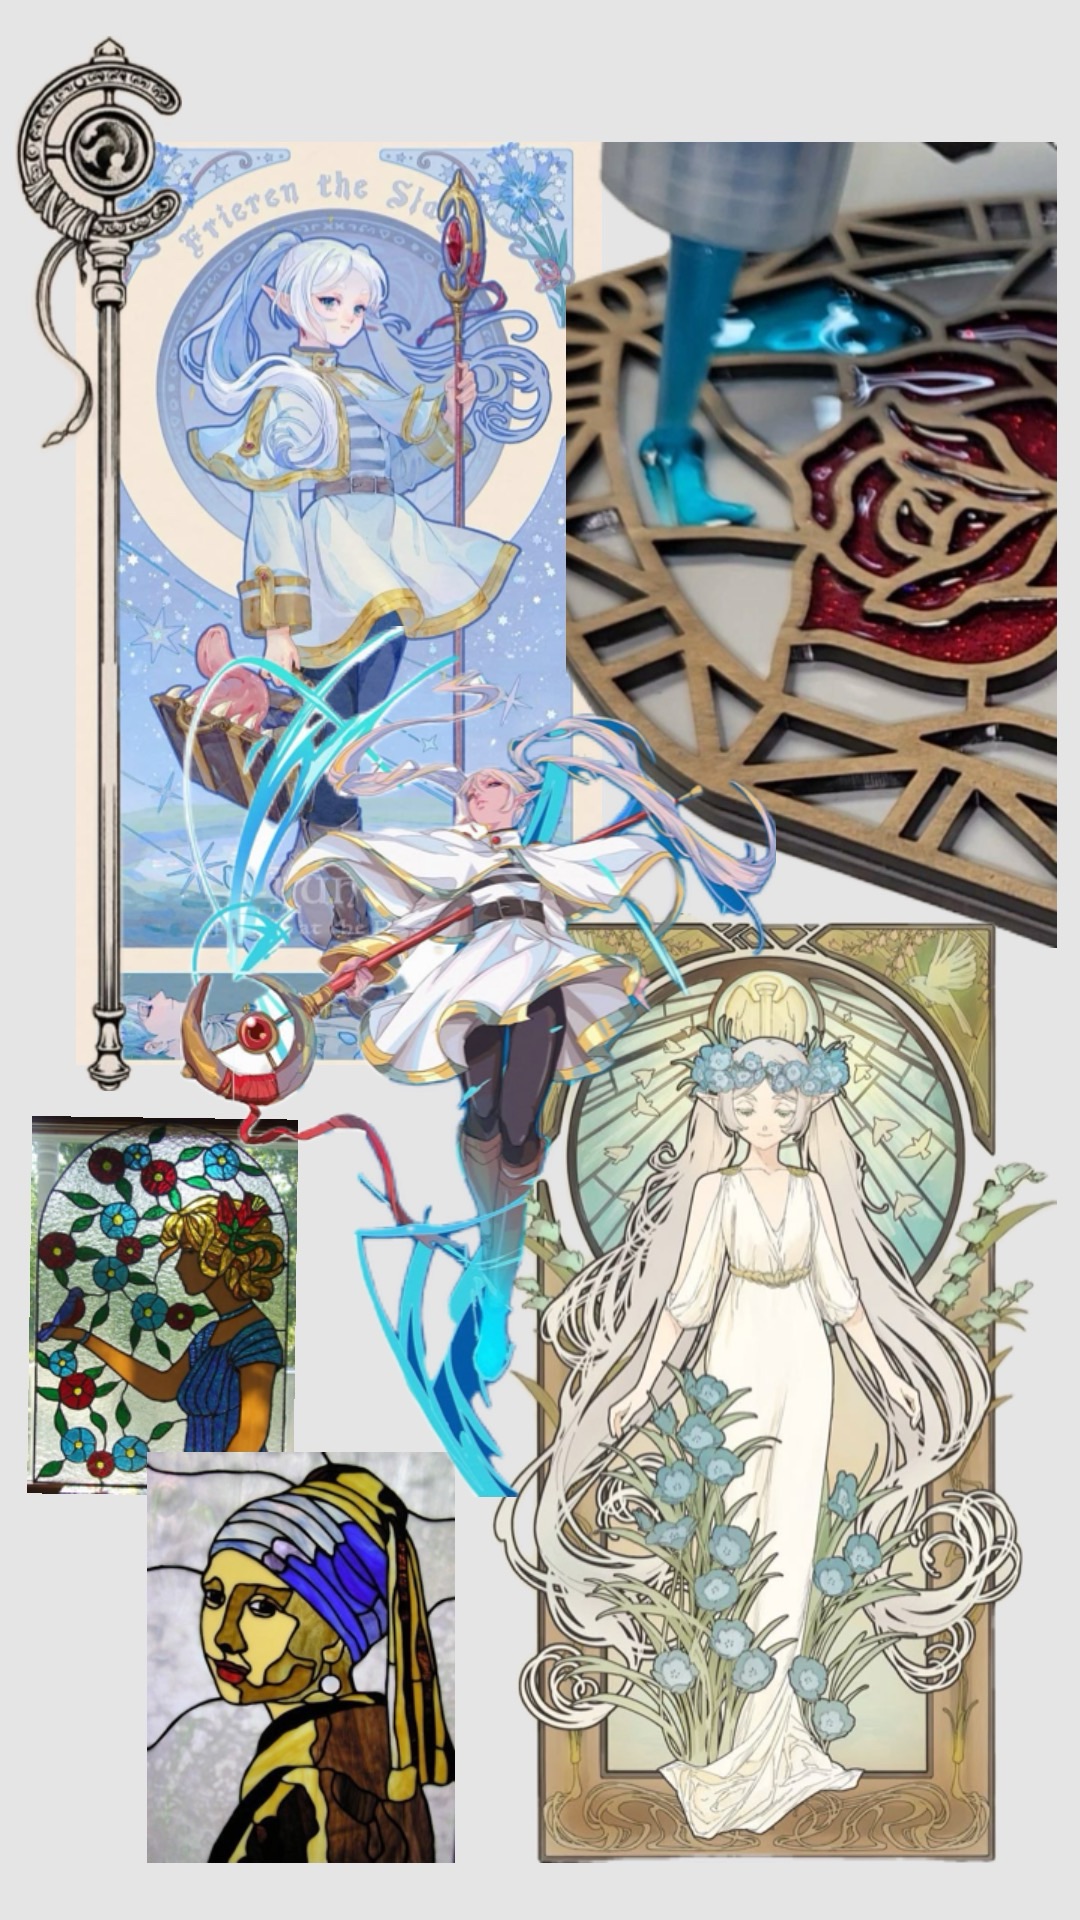
The first part of this is the hardest: figure out what design you want to make. I had some Frieren art nouveau pieces saved on Pinterest, and I later saw a video of someone doing faux stained glass with a wood outline and mystery viscous liquid, the intersection of which led to this project.
Most of my projects start with two moodboards, one for the general idea and one for the composition. Since I already had stuff saved on Pinterest, it made sense to use their collage app Shuffles which I really like because I can pull cutouts directly from my saved pins, but I’ve also used Canva, Miro, and Freeform.
I then:
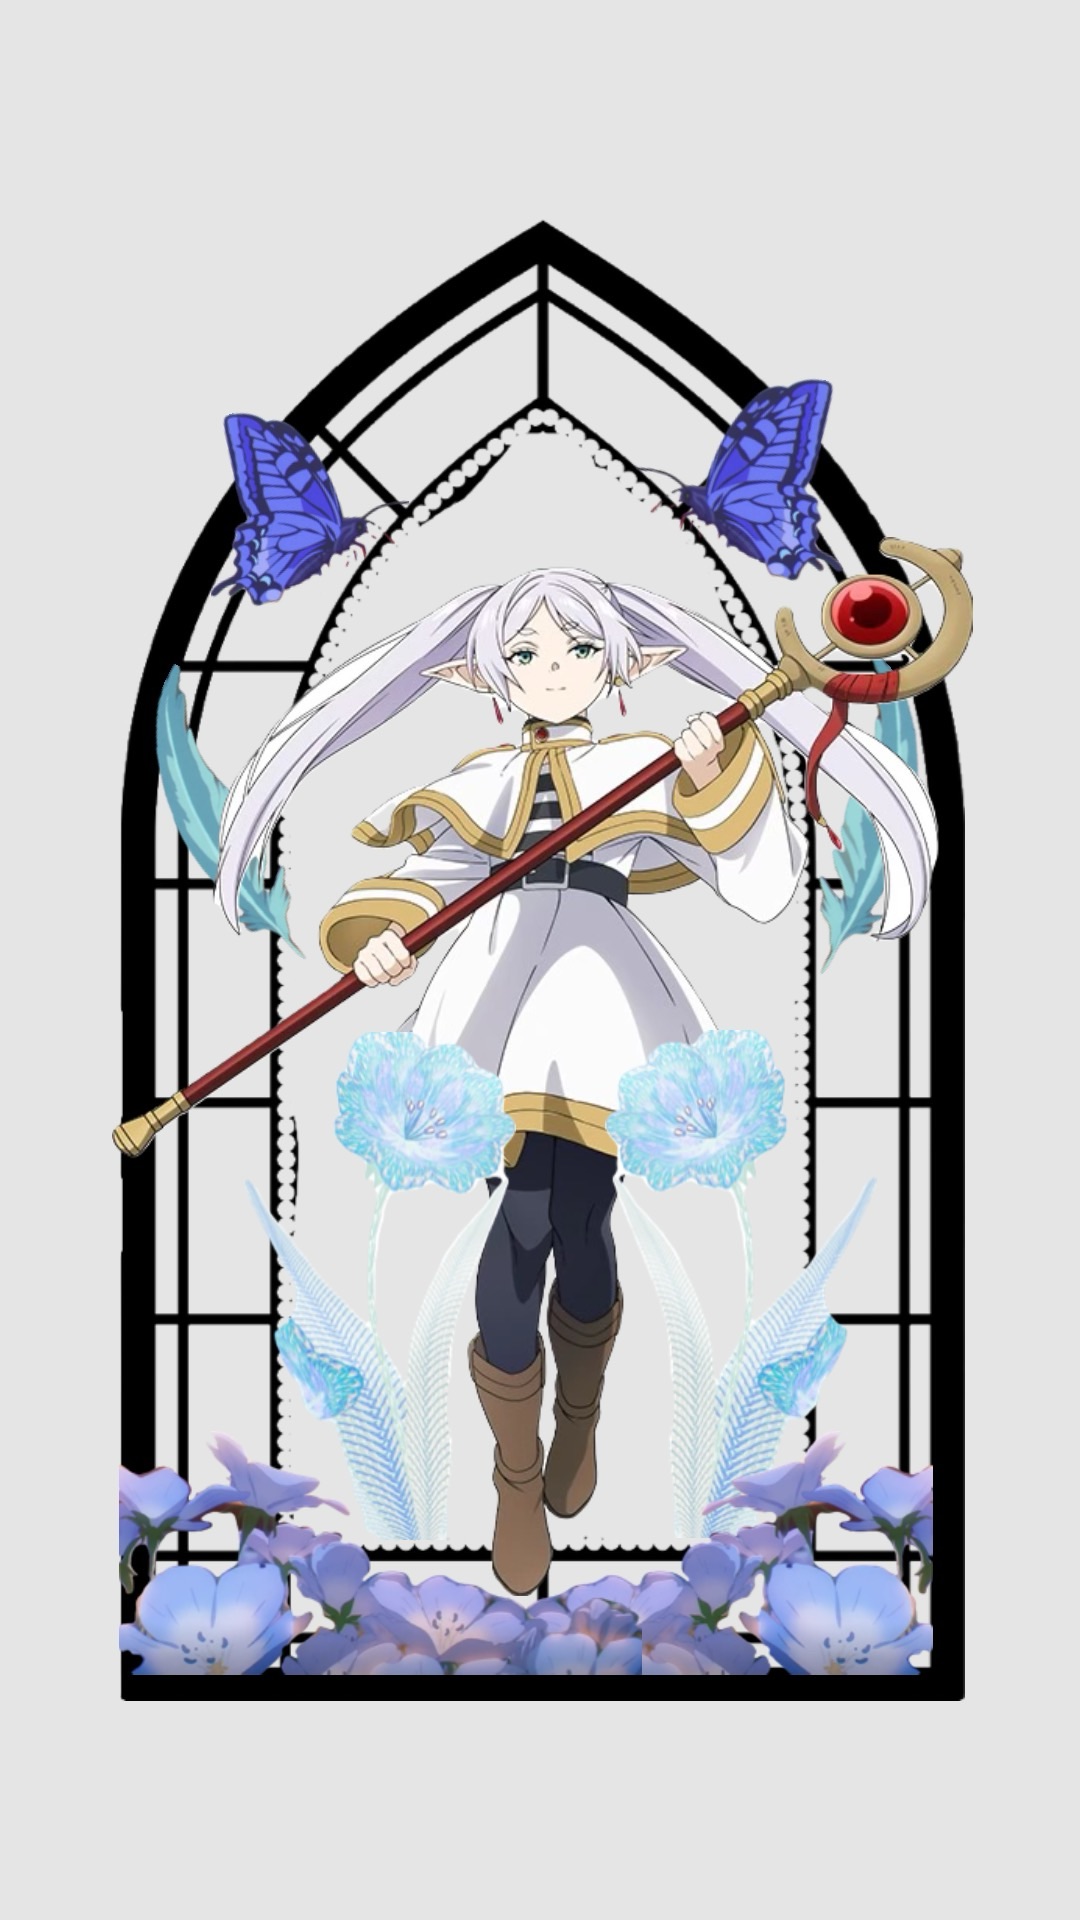
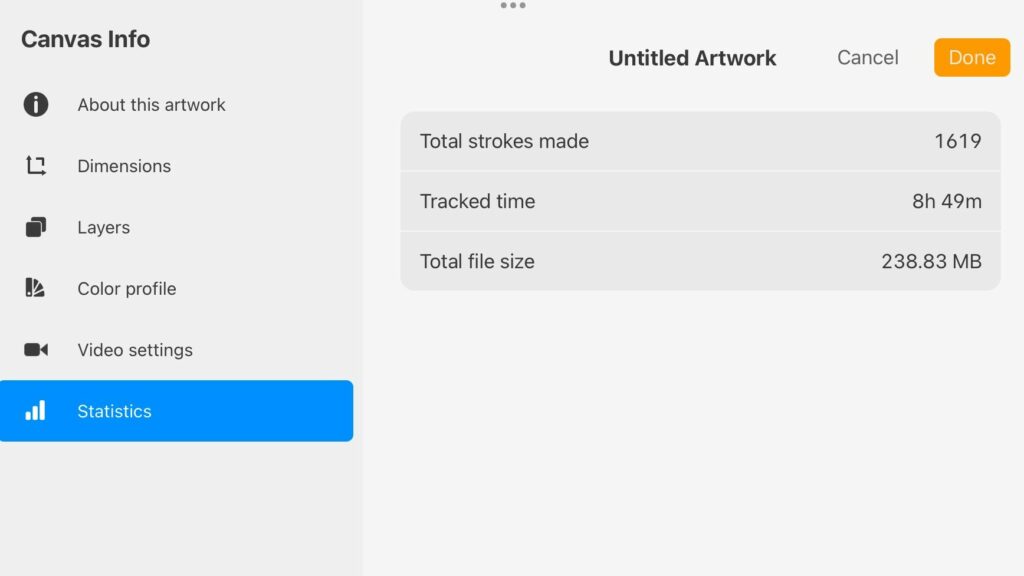
- Drew the design in Procreate on my iPad (stats in screenshot)
- Used Inkscape to convert the PNG (raster with transparent background) to a SVG (vector) by using the Trace Bitmap function
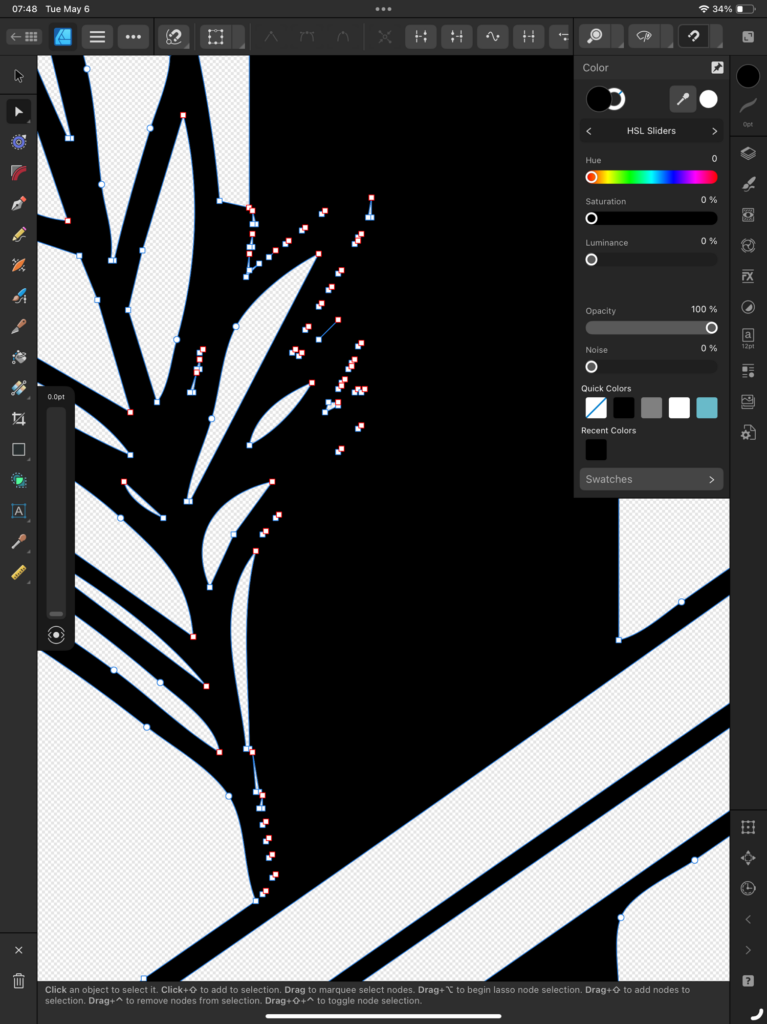
- Returned to the iPad to clean up the vector and measure line width on Affinity Designer
Challenges
Click the arrow to expand
Consider only working on one layer of acrylic and only cutting out the outline while deep engraving the rest of the design.
This makes it so only the frame needs to be a vector. The entire next phase of this project can be skipped if you don’t need to physically clean up a fragile laser-cut design.
I overestimated my patience with designing and cleaning up an intricate design.
I also significantly overestimated my ability to work with the thin line widths. I thought it would look weird with thick lines in the detailed areas, but I ended up losing a lot of details and struggling a lot in the next step.
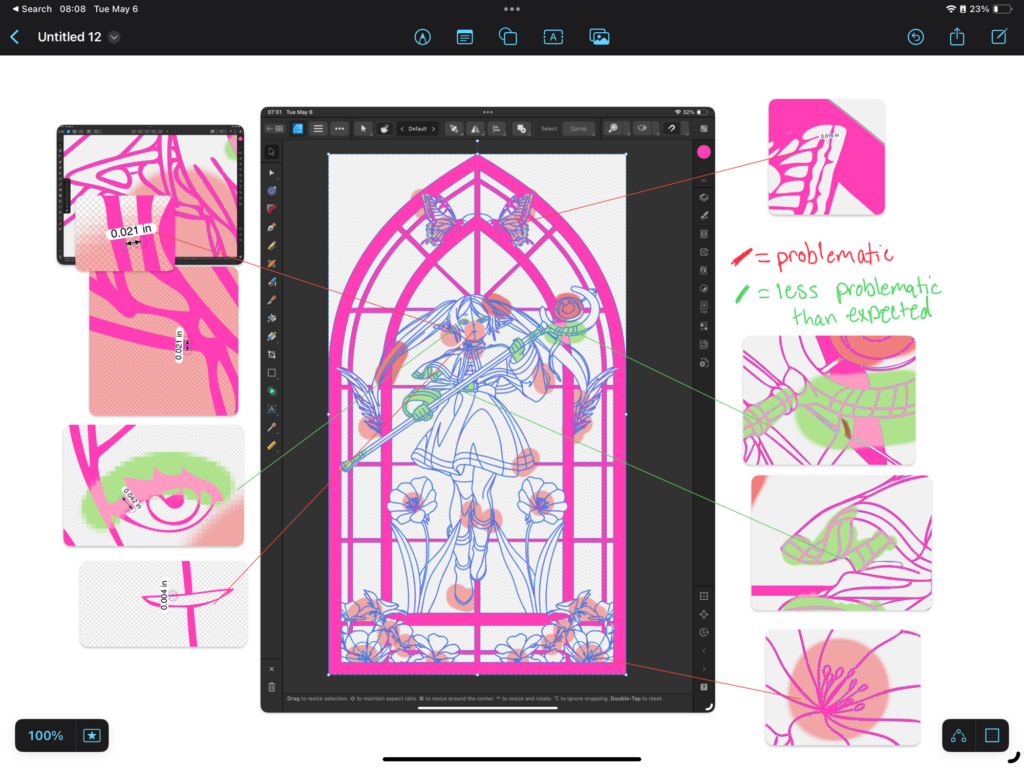
Possible problem #1: Line Widths
If I were to do this again I would ensure that the thinnest lines in my design were no thinner than 0.4”, but if you take a look at the second image here, you’ll see that line width isn’t everything.
Possible problem #2: Sharp corners and large pieces
Sharp corners are not fun to remove. Large pieces are also stressful to remove. I think if this was redone, with more segments, and the more evenly distributed they are, the better off it would go.
Possible problem #3: Too many nodes / not vectorizing earlier in the design process
Because I vectorized a raster design, there were many more nodes than needed and I couldn’t separate the shapes and simplify them individually, so where a cutting/plotting machine would typically move in smooth curves or straight lines, there were likely microscopic jagged edges from these microscopic shifts in position that made things more difficult later.
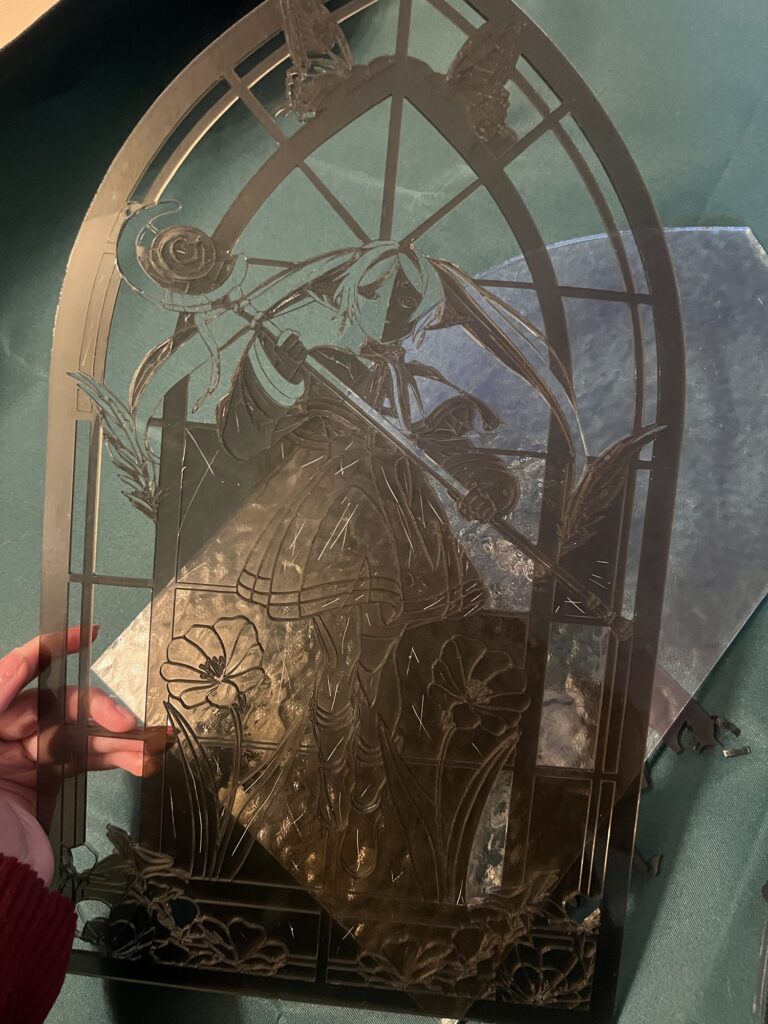
Laser cutting the material
First, the materials: I found a flocked clear acrylic and a semi transparent black acrylic. These were clearly different thicknesses and types so they needed to be calibrated for separately, both in setting the focus and the cut settings. These didn’t fit fully in the laser cutter, so I used the bandsaw to cut them to size. (This was my first ever time using a bandsaw, but they are much less intimidating than they appear!)
I should mention that I did take off the plastic backing from both sides of the acrylic panels because I was anxious about it catching fire. Not sure if that made any of the rest of this project more difficult, so if you know, let me know.
Since I was working with two layers, I had separate SVG files for the frame outline and the full design. I first opened these in the same file to make sure they were the exact same size.
The Epilog laser at CRASH uses a print driver with Corel Draw, so you can set up the settings after opening the print dialog.
After laying out your design(s) add a small shape outside the design area, select only that shape, and set the print area to “selection only”. Start conservatively and do multiple test cuts until you’ve found settings that make sense for your project – prioritizing safety, of course! Then, you’re good to cut.
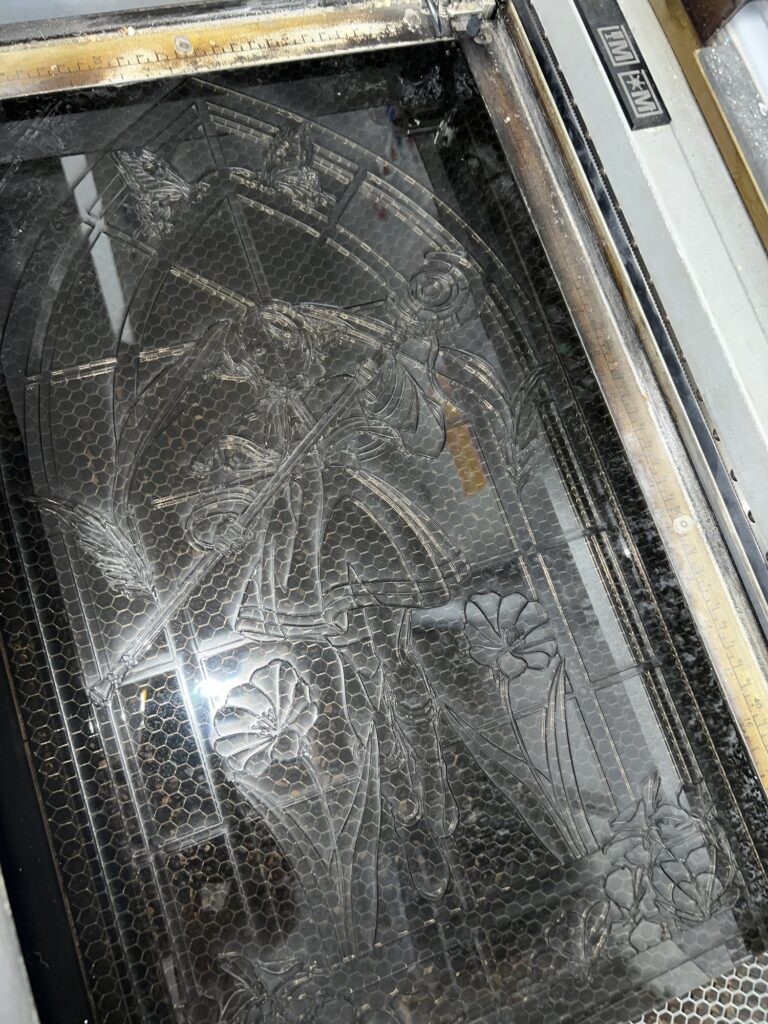
I babysat it for a little while but I was a bit too conservative with my speed settings, so the full design took nearly 2 hours.
I got bored sometime in the first hour, so I started cleaning up the shop a little bit. There should now be a mousepad for the mouse connected to the laser cutter laptop.
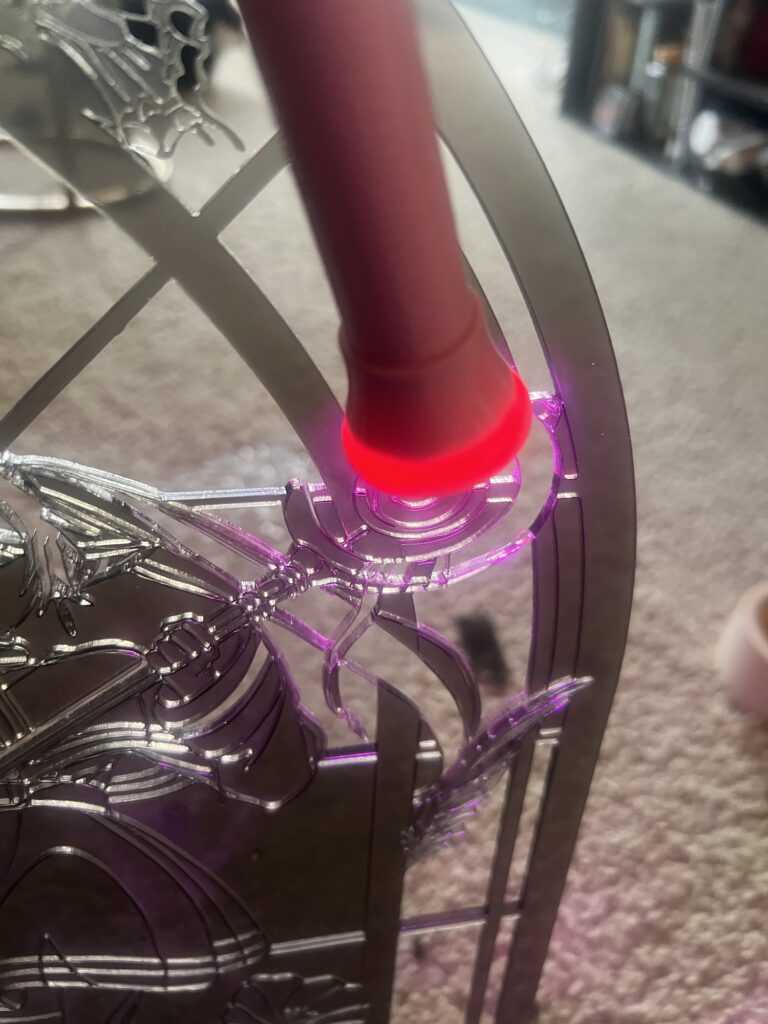
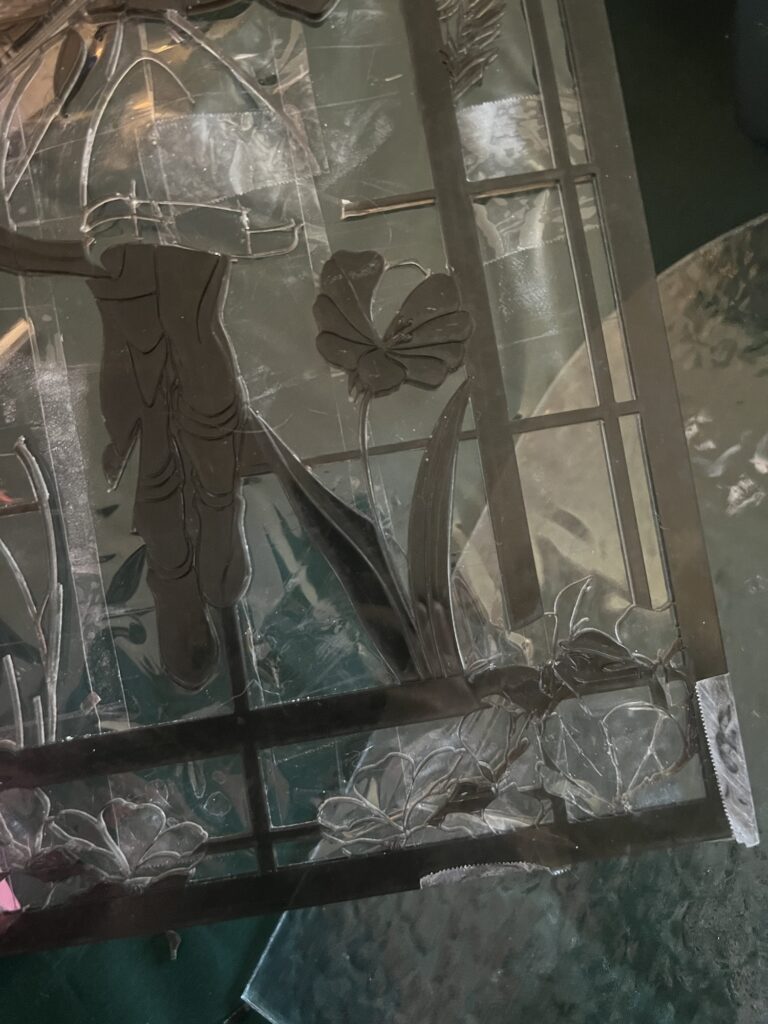
“Weeding” the negative space out of the laser cut material
If you deep engrave the design rather than cut it, you don’t have to do this part. I use the term “weeding” because that’s the equivalent term for cleaning up vinyl after it’s been through an electronic cutting machine, but I don’t know if there’s a similar term for this process of removing small negative pieces that are stuck in the outlines.
My settings may have been a tad too conservative – I made multiple test cuts of very small rectangles and selected the settings that made me have to shake the acrylic a bit to get the negative part out. Higher settings caused some resolution loss, almost as if the invisible laser beam was wider, which I was worried would cause the smallest details to disappear.
The alternative may have been worse though, because the laser did not cut evenly all the way throughout the design. This meant I had to force a lot of pieces out, breaking other thin walls, and this only got more difficult the fewer negative pieces there were left in the lines.
Challenges (with photos, click to expand)
Some images below show my attempts and the only things I tried that aren’t pictured involved soaking the acrylic in either soapy water, hot water, or alcohol. Keep in mind I’m fairly certain the type of acrylic I used was not the kind that becomes brittle when in contact with alcohol and it showed no signs of chemical processing. The most affective soak I think was actually warm water, because it meant that I could slightly bend the acrylic with more force than it would typically take without breaking. For some reason, brushing this cheap nail prep liquid (which is just Isopropyl Alcohol, Ehtyl Acetate, and Isobutyl Acetate) along the “seams” also helped free up some pieces.
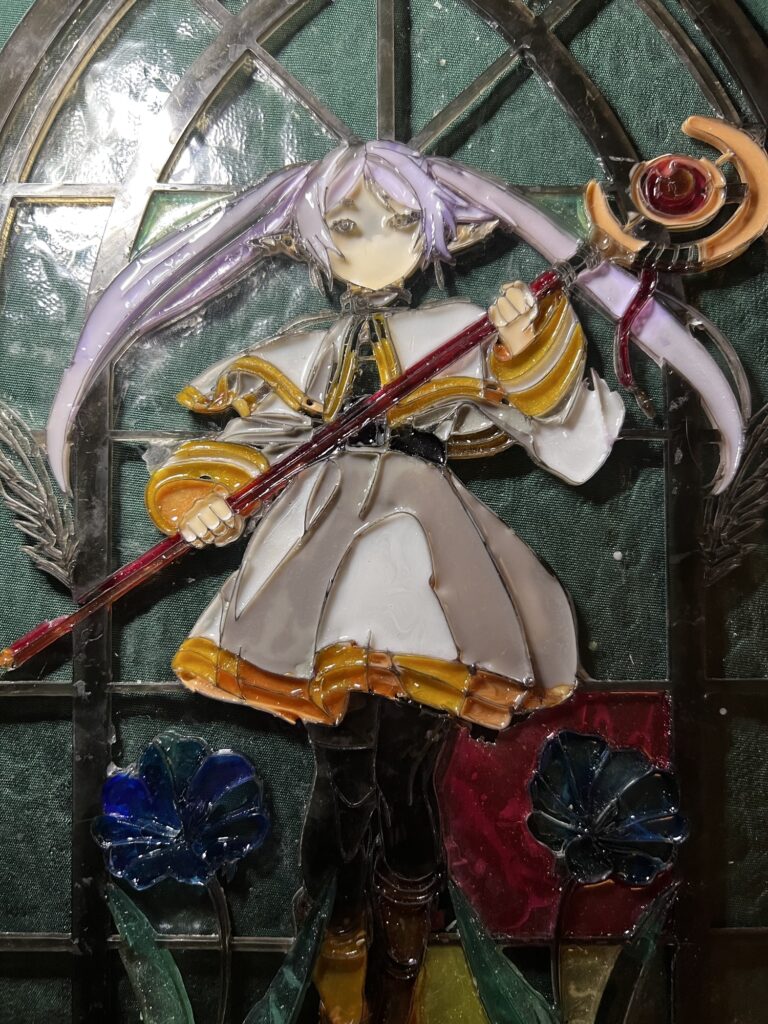
Painting with colored resin to fill in the negative space
When I made the design, I drew lines to separate shadow colors, base colors, and highlight colors, and in making the color pots I tried to mix the same colors out for each. If you’re using UV resin, this is easier to do ahead of time, because it won’t cure until it’s exposed to UV light. You can use pretty much anything to color resin – I used liquid colorants, acrylic craft paint, and eyeshadow (which is basically just pressed mica). If you haven’t before, some essentials when working with resin: gloves, silicone tools, silicone or otherwise nonstick mats, tape, and alcohol wipes.
If you’re going the deep engraving route, I imagine you could also mix mod podge with food coloring (or ink or craft paint) and fill in the shallow parts with a craft pipette or a syringe. Semi-opaque nail polish may also work. Any liquid that is somewhat self-leveling and is sticky before curing may dome nicely.
My regrets:
- Underestimating the opacity of some of the layers when filling in the shapes, in part because I underestimated how much of each color I’d need to make and couldn’t mix exactly the same color and opacity twice. You have an opportunity to really paint and blend with the resin colors here which I didn’t take full advantage of.
- Not filling in the whole design with tape backing the negative portions first before attaching it to the clear outline and doing the final layer. I did not seal the edges with glue evenly enough or do a primer layer with UV resin, which meant that the epoxy resin seeped out into shapes it wasn’t supposed to, which caused texture issues and air bubbles.
- Not waiting until the epoxy was tacky but not liquid before laying the textured side of the wall cling over the final layer of resin. Caused air bubbles and creases.

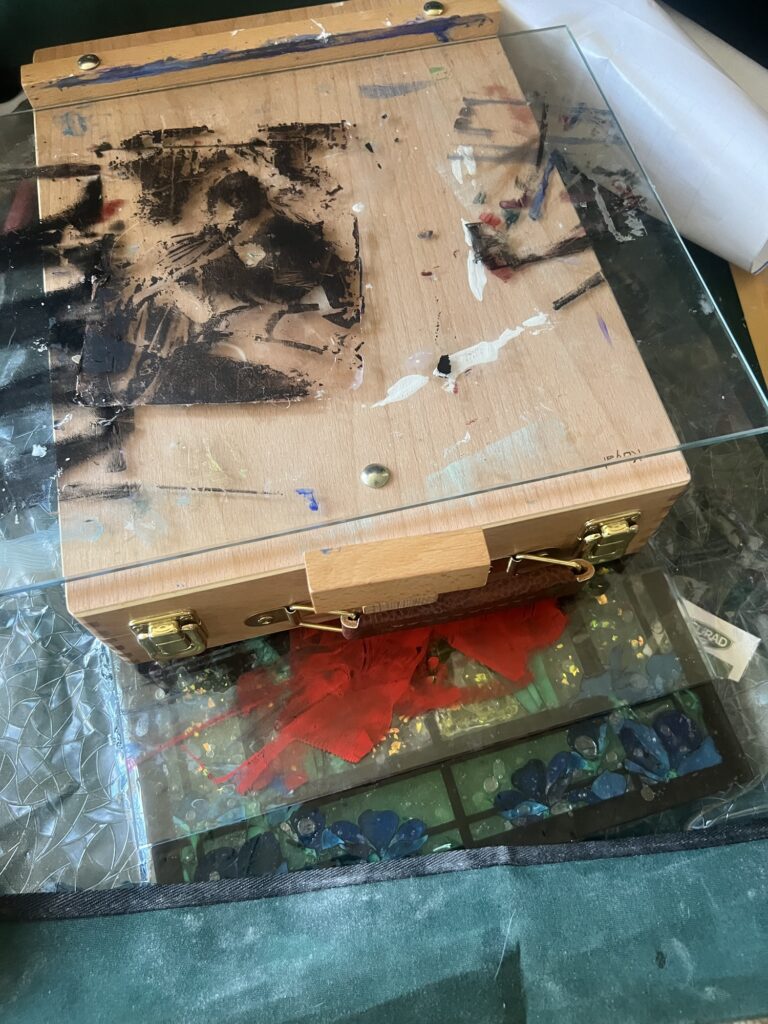
Fixing mistakes and adding final touches
Since the black acrylic wasn’t opaque, the first fix needed was to go over the lines with a black paint marker. If you go with the engraving method, you’d be using clear acrylic, so you’d need to do this step as well.
I also had some thin cured layers of epoxy over air bubbles, which could be sanded with some dremel/nail drill bits. I used the grinding, sanding, and polishing bits to try to even out the creases from the window cling.
At this point, I should have figured out a way to mount the piece, but I neglected to do so. Having that built into the design and/or using resin would probably be wise.
After the main parts were completed, I had done some irreparable damage. I feel like it’s generally more effective to embellish flaws in artwork rather than try to hide them. This is the fun part where you can let your inner mad scientist out – so I experimented. I tried the following:
- Brushing gold foil, glitter glue, and paint all over, letting it get into the nooks and crannies of the air bubbles and creases from the window cling. This made me hate the holes from the air bubbles a little less.
- Also doing the above while spraying a mixture of alcohol and dish soap to promote organic shapes in the uneven texture. This was interesting.
- Using dimensional fabric paint to go over the lines. I didn’t like the color payoff and didn’t want to waste the entire bottle on this, so I ended up DIYing some dimensional paint/liquid leading by mixing DAP, black paint, and Liquitex slow-dri fluid retardant, applied with a silicone squeezable precision tube with a blunt needle tip. This worked VERY well, but you can only do a little at a time because it takes a while to dry.
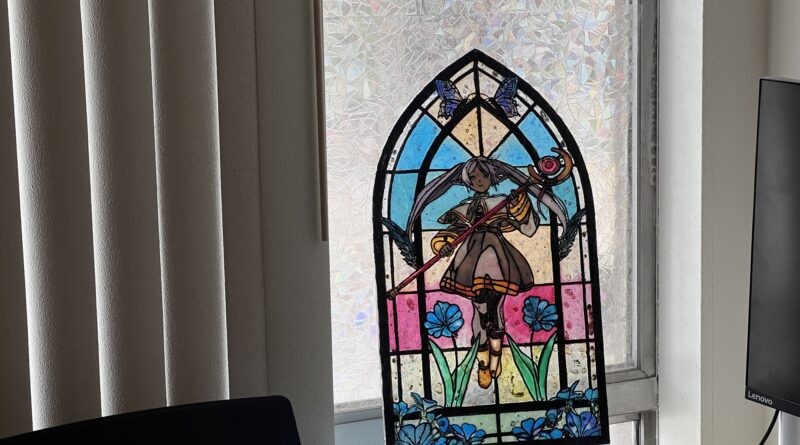
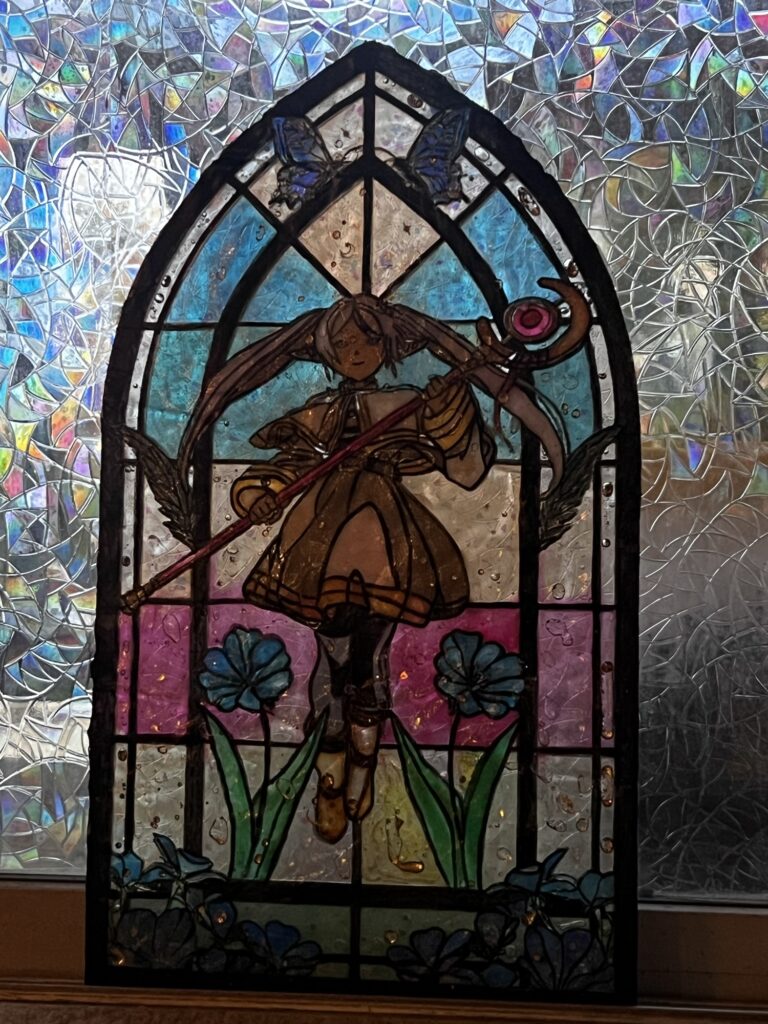
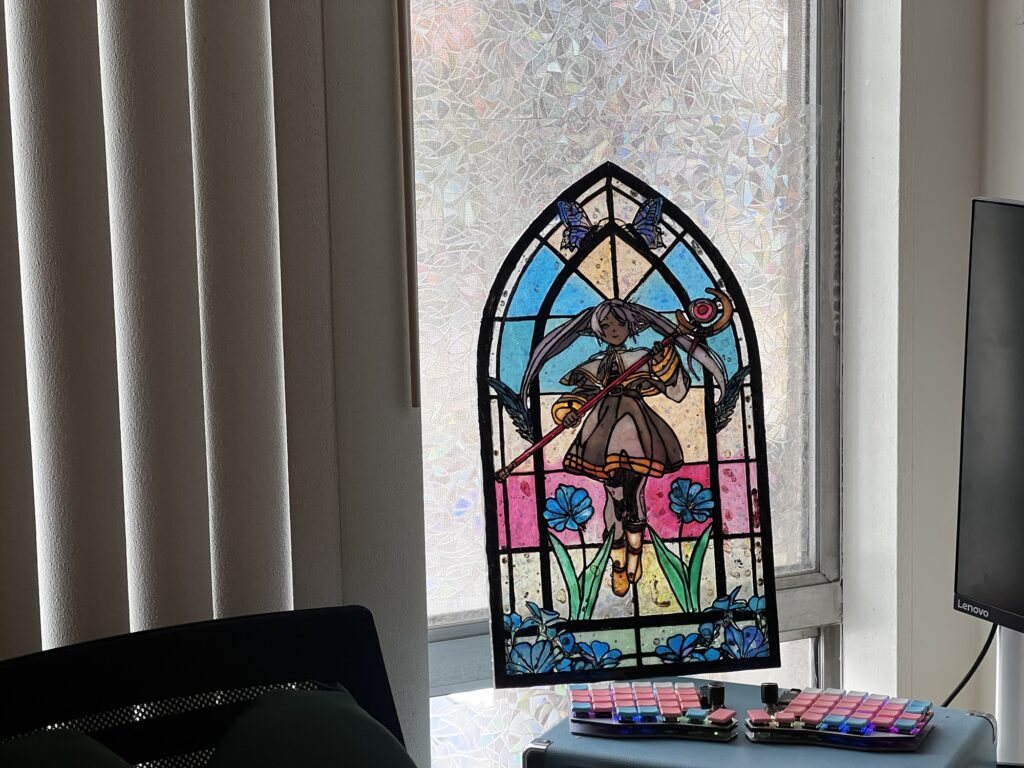
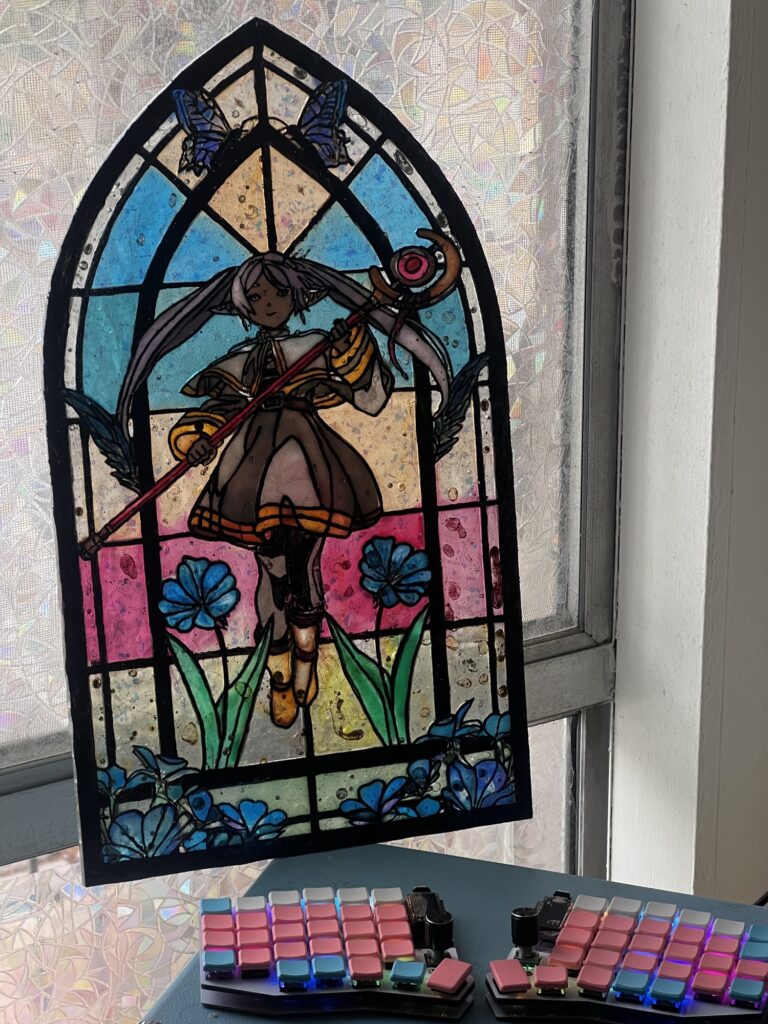
I’m sure I’ll keep adding things to bring it closer to my vision, but for now, here’s what it looks like. It actually looks very nice from afar, which is how I’m seeing it most of the time.
Thanks for reading! My art handle is usually @vibefae you’d like to check out my other projects on Instagram or see my Redbubble shop.